- Software
- Industries
- Education
- Case
- Support
Download Centre

Looks like you don't have ESC button on your device
Download IronCAD DCS
Choose one of the following options
trial versionHas a license
Scroll down to start reading the guide
Go to the client computer where IronCAD DCS 20xx is installed.
Go to Start Menu> IronCAD DCS 20xx>License Management Tool>Configure License Options>Next


If you get an error message after the installation process is complete, it may be because you have a space in your Windows username. Try unpacking the installation file manually by following the steps below. We have written how to do this in both Windows 11 and Windows 10.
This is for Windows 11
If the path to the folder that handles "My Documents" and "Downloaded Files" etc. contains a space in your username (\Firstname_space_Password\) you need to manually unpack the installation file, otherwise an error message will appear during installation. To unzip, you can for example use WinRAR/WinZIP or preferably the easy to use and compact 7-zip: https://www.7-zip.org/
Then you can right-click on the file you downloaded and choose Show more options

Then select 7-zip followed by Unzip to "IronCAD_DCS2023SP1_SWE\

Then run the installation file itself in the new folder by right-clicking on the *.exe file and selecting Run as administrator:

This applies to Windows 10
If the path to the folder that handles "My Documents" and "Retrieved Files" etc. contains a space in your username (\Firstname_Space_Password\) you need to manually unzip the installation file, otherwise an error message will appear during installation. To unzip, you can use WinRAR/WinZIP or the easy to use and compact 7-zip: https://www.7-zip.org/
Then you can right-click on the file you downloaded and choose to unzip it into a new folder which will be created automatically.

Then run the installation file itself in the new folder by right-clicking on the *.exe file and selecting Run as administrator:

Then the configuration of the client was finished. Now the program should start.
If you are an existing customer and have previously configured the client via lsconfigclient.exe, we recommend that you follow step 4.
This only applies to users who have previously configured the clients via lsconfigclient.exe
First, configure the client according to Steps 1-3 in the guide above.
Then we recommend that you go to lsconfigclient.exe and delete what is there. This is mainly to minimize any connection problems and to have a simpler interface via License Configuration.
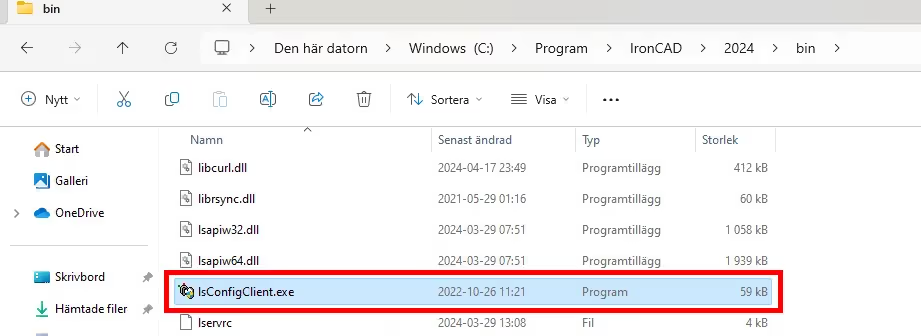
Launch Explorer and go to the following path: C:\Program Files\IronCAD\20XX\bin
Locate lsconfigclient.exe and double-click the file

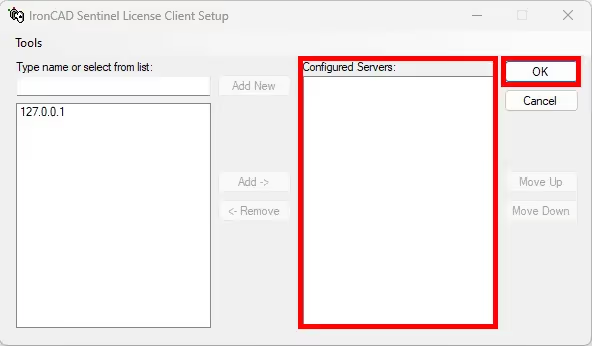
Under the list, select (one at a time) the server and then press Remove. Repeat this process until the list of servers is emptied.

When the list is empty, press OK

Now that you have cleaned up the old servers, you no longer need to use lsconfigclient.exe to access the IP address of the network license server.