- Software
- Industries
- Education
- Case
- Support
Download Centre

Looks like you don't have ESC button on your device
Download IronCAD DCS
Choose one of the following options
trial versionHas a license
Scroll down to start reading the guide
Go to http://services.ironcad.com/activation/
Fill in the requested information. Here you use the information found in your licence certificate.
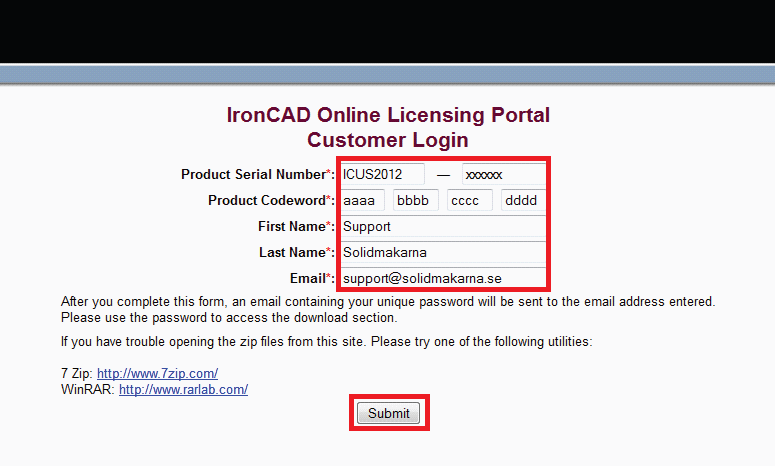
Click the Submit button to continue.
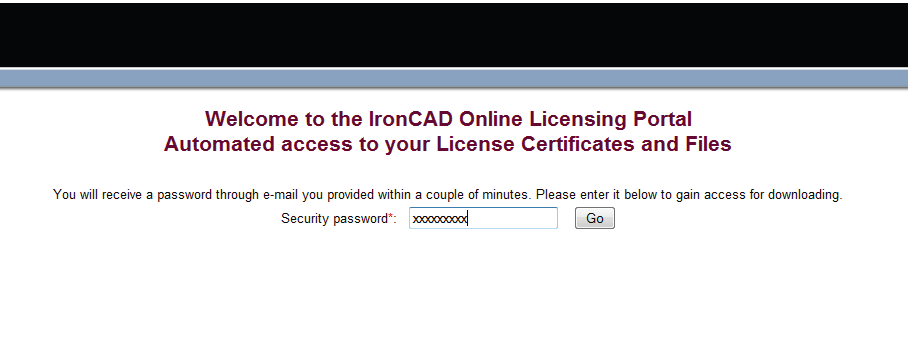
An email will be sent to the email address you provided.
OBS! Do not click on the Continue button until you have received the email from IronCAD, there is a risk of "time out" and having to start again.
Copy the password from the email and paste it into your browser.
If you get an error message after the installation process is complete, it may be because you have a space in your Windows username. Try unpacking the installation file manually by following the steps below. We have written how to do this in both Windows 11 and Windows 10.
This is for Windows 11
If the path to the folder that handles "My Documents" and "Downloaded Files" etc. contains a space in your username (\Firstname_space_Password\) you need to manually unpack the installation file, otherwise an error message will appear during installation. To unzip, you can for example use WinRAR/WinZIP or preferably the easy to use and compact 7-zip: https://www.7-zip.org/
Then you can right-click on the file you downloaded and choose Show more options

Then select 7-zip followed by Unzip to "IronCAD_DCS2023SP1_SWE\

Then run the installation file itself in the new folder by right-clicking on the *.exe file and selecting Run as administrator:

This applies to Windows 10
If the path to the folder that handles "My Documents" and "Retrieved Files" etc. contains a space in your username (\Firstname_Space_Password\) you need to manually unzip the installation file, otherwise an error message will appear during installation. To unzip, you can use WinRAR/WinZIP or the easy to use and compact 7-zip: https://www.7-zip.org/
Then you can right-click on the file you downloaded and choose to unzip it into a new folder which will be created automatically.

Then run the installation file itself in the new folder by right-clicking on the *.exe file and selecting Run as administrator:

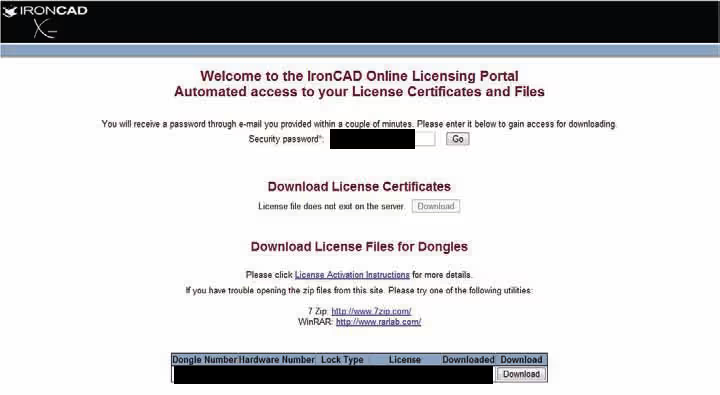
Now click the Continue button.
Your license files are now listed here.
Click on the Download button for the license file that corresponds to your USB lock.
Make sure your USB lock (red-transparent) is in the server.
Go to Windows Start Menu> All Programs> CAXA> CAXA Shared> CAXA Network Lock Management Tool
Select the server's IP address/name and then click on the red icon to stop the service:
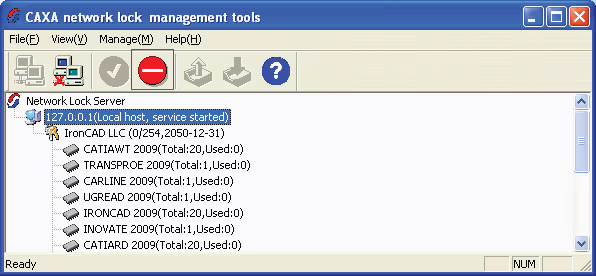
Then click Import
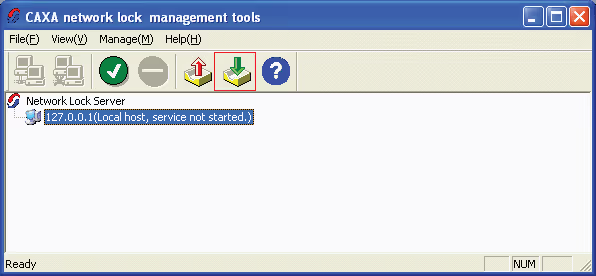
Select the license file you just downloaded.
Click on Apply to start the distribution of the licenses:
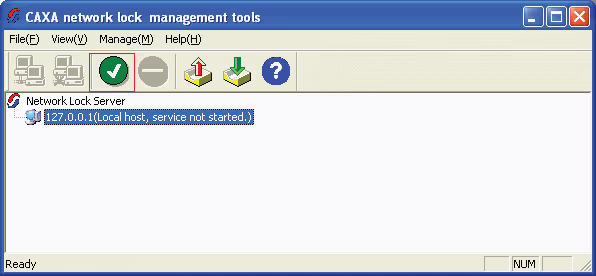
The license has now been imported to the USB lock.
If the import of the license file was successful, the USB software should now list the new version.
Check the list for the latest version:
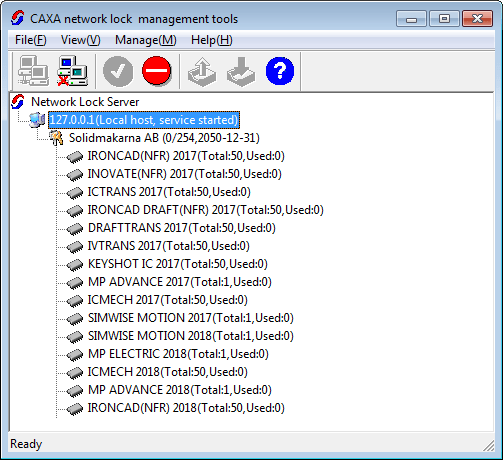
The activation is now complete. Check that the license is working properly by starting IRONCAD on one of the clients.