- Software
- Industries
- Education
- Case
- Support
Download Centre

Looks like you don't have ESC button on your device
Download IronCAD DCS
Choose one of the following options
trial versionHas a license
Scroll down to start reading the guide
Right-click on the installation file and select Run as administrator.
It will then take a few minutes for the installation to start as the files are unpacked in the background.

The installation file should now be unpacked. Start the process by clicking Install.
Tips! See green marking. If you have a space in the text under Destination Folder, you will get an error message. See action below the image.
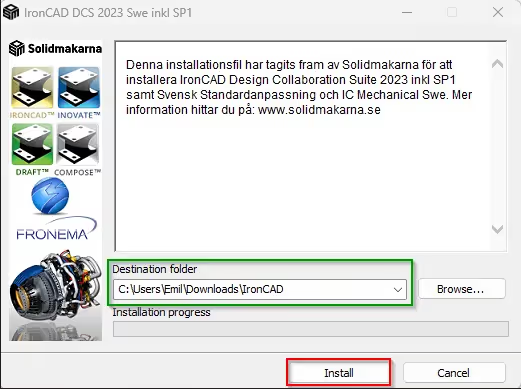
If you get an error message after the installation process is complete, it may be because you have a space in your Windows username. Try unpacking the installation file manually by following the steps below. We have written how to do this in both Windows 11 and Windows 10.
This is for Windows 11
If the path to the folder that handles "My Documents" and "Downloaded Files" etc. contains a space in your username (\Firstname_space_Password\) you need to manually unpack the installation file, otherwise an error message will appear during installation. To unzip, you can for example use WinRAR/WinZIP or preferably the easy to use and compact 7-zip: https://www.7-zip.org/
Then you can right-click on the file you downloaded and choose Show more options

Then select 7-zip followed by Unzip to "IronCAD_DCS2023SP1_SWE\

Then run the installation file itself in the new folder by right-clicking on the *.exe file and selecting Run as administrator:

This applies to Windows 10
If the path to the folder that handles "My Documents" and "Retrieved Files" etc. contains a space in your username (\Firstname_Space_Password\) you need to manually unzip the installation file, otherwise an error message will appear during installation. To unzip, you can use WinRAR/WinZIP or the easy to use and compact 7-zip: https://www.7-zip.org/
Then you can right-click on the file you downloaded and choose to unzip it into a new folder which will be created automatically.

Then run the installation file itself in the new folder by right-clicking on the *.exe file and selecting Run as administrator:

On some computers, this information may appear after double-clicking the installation file. Then click More Information.

Then click Run anyway.

Now choose to start the installation by clicking Install.
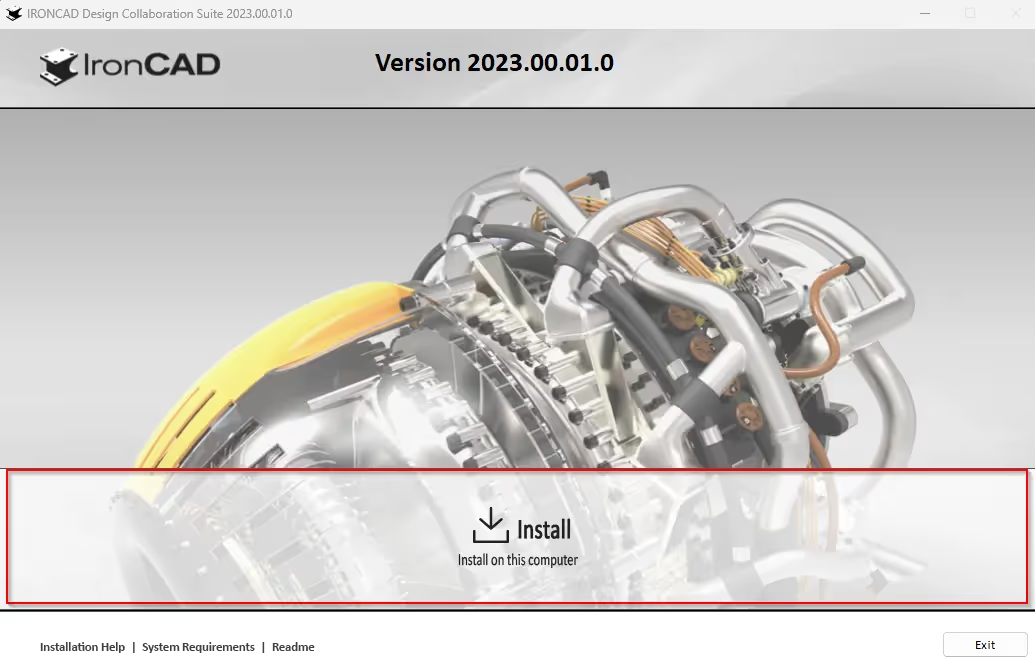
Choose to accept the license agreement by clicking I Accept, then click Next.

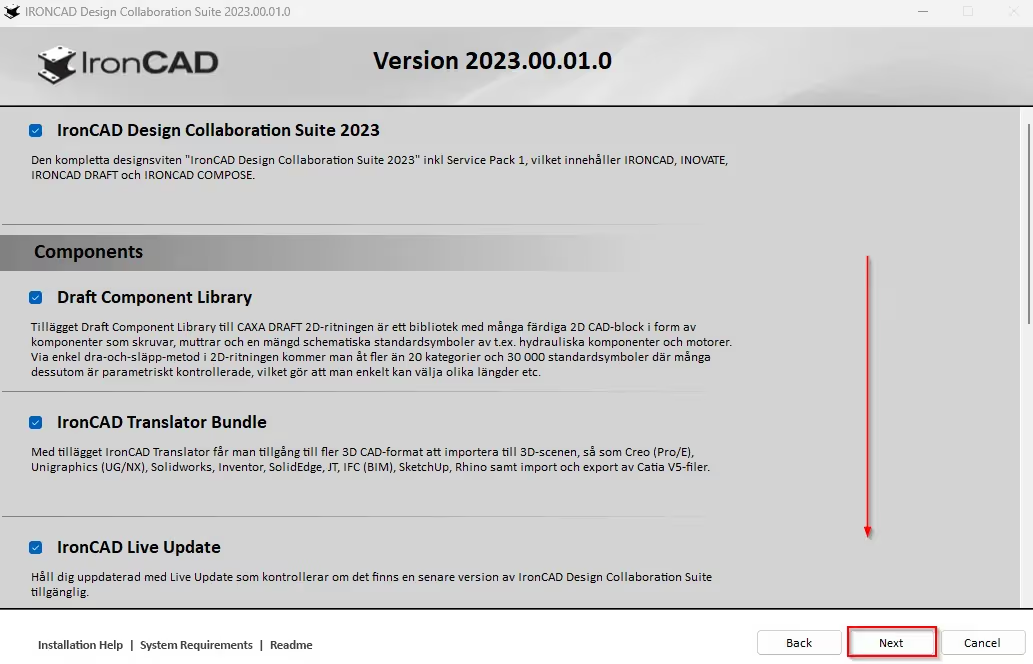
Here you choose which extensions will be installed with IronCAD DCS. Scroll down the list to see all extensions. The most common way is to keep the extensions checked, but if you want to remove an extension, you can do so by clicking on the checkbox to the left of the extension.
Then click Next.
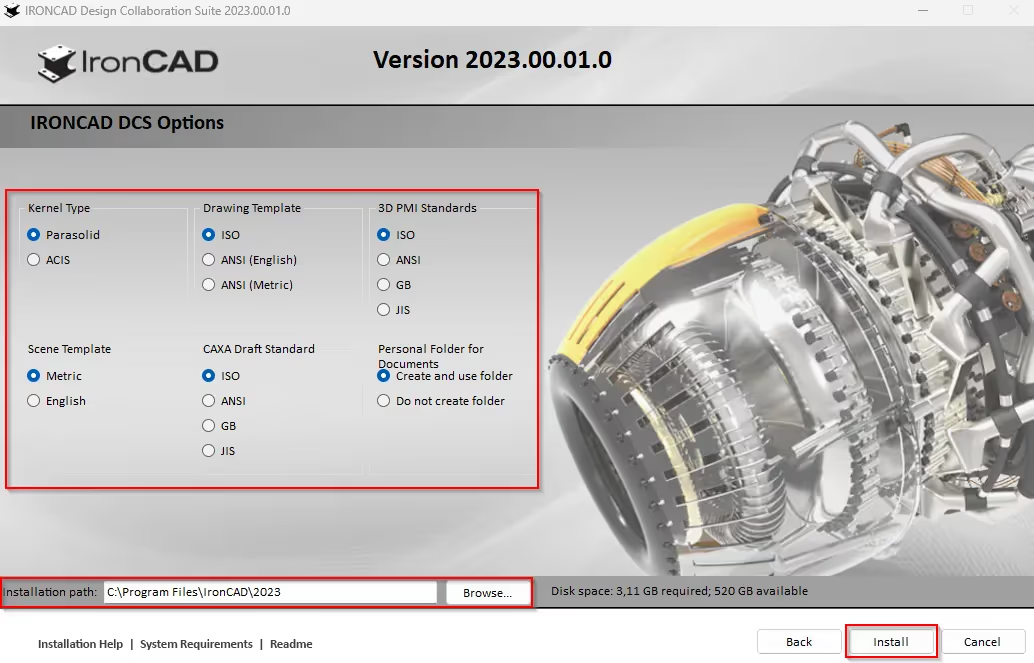
A) Select Standard installation, ISO, metric units to run a standard installation. You can by selecting "Custom installation..." to change the installation path. Click on Install to start the installation without customising it.
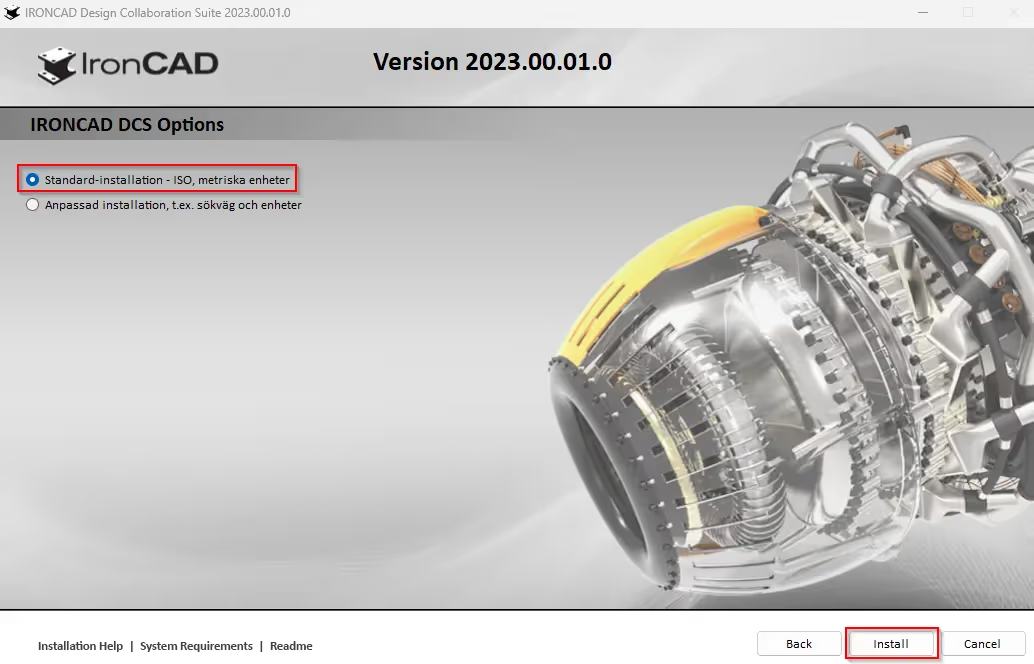
When selecting "Custom installation", you can, among other things, change the installation path. Click Install to begin the installation.
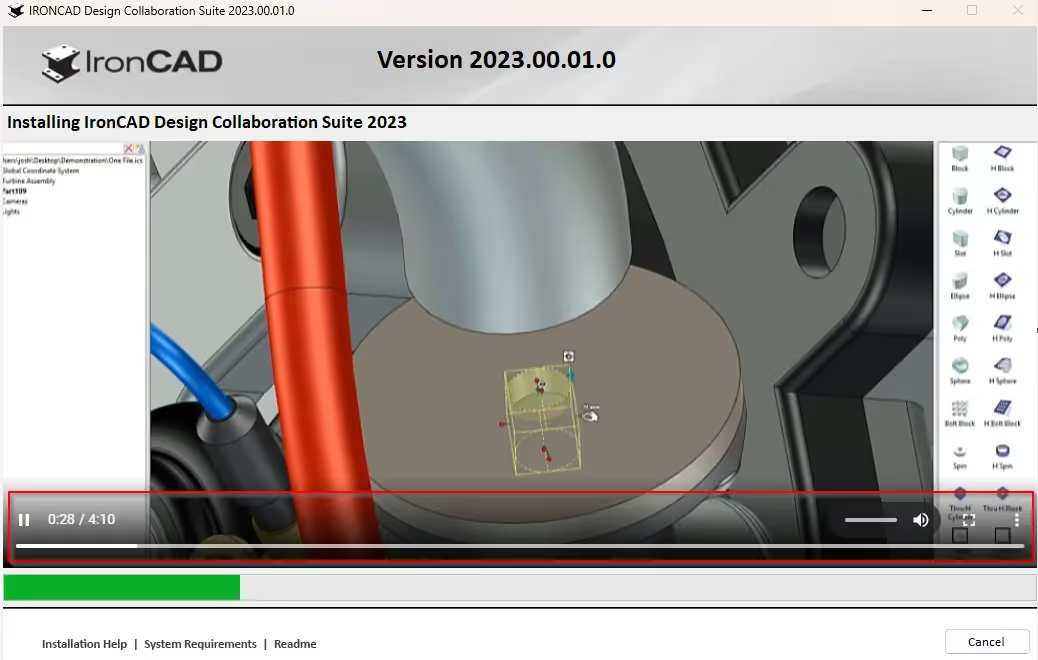
The installation of IronCAD DCS has now started. In this mode you do not need to make any selection.
NOTE, if you want to pause the movie or mute the sound, keep the cursor on the movie, at the bottom as highlighted you have the controls for the movie.
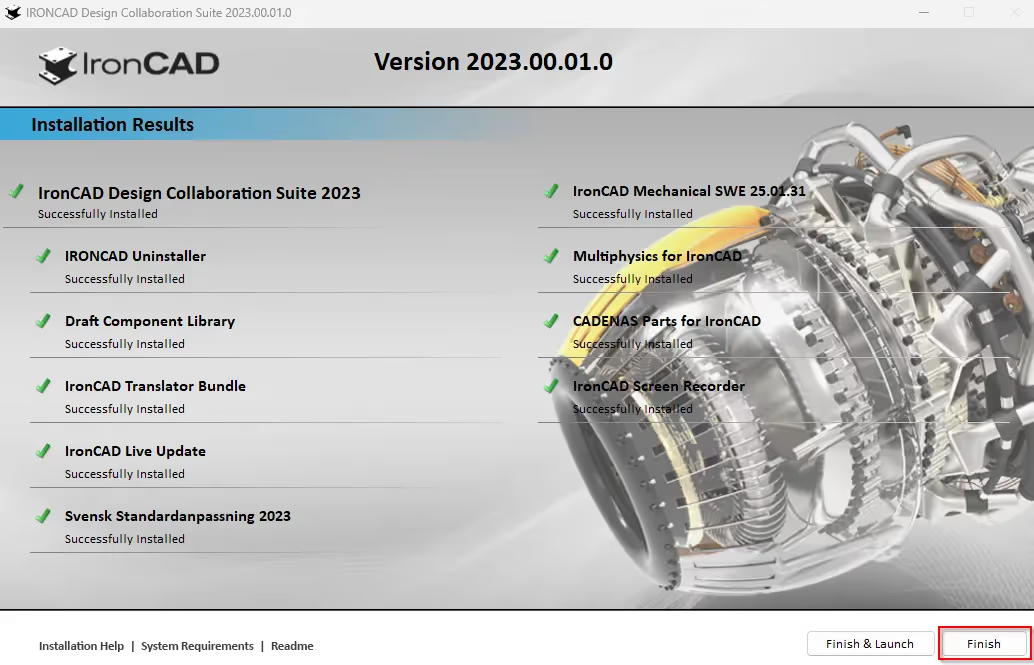
Now IronCAD DCS and its extensions are installed. Now press Finish.
Have you installed IronCAD DCS to try it for free for 30 days?
Click here to view a guide on how to do this.
Are you an existing customer?
The installation is now complete! Have you encountered problems? Please see our Frequently Asked Questions:
https://www.solidmakarna.se/vanliga-fragor