LAST CHECKED:
October 29, 2026

Emil Rindell

Jonas Bryntesson

Henrik Andersson
PUBLISHED:
2025-06-09
Emil Rindell
Jonas Bryntesson
Henrik Andersson
2025-06-09
Code Generator allows you to automatically generate and assign names, numbers and/or descriptions from values and variables related to the model. This means that if, for example, you retrieve the length of a beam, the thickness of a plate, the length of a 3D curve and want to use these values as User Name, Part Number or Description, or create completely new properties, all this and much more can be done with this tool.
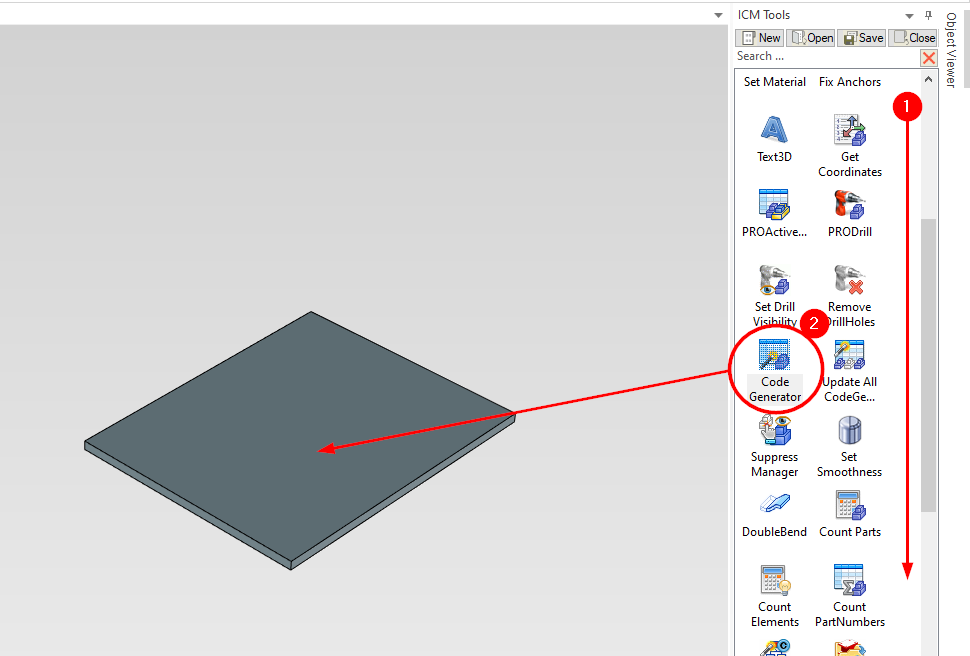
Start by going to the ICM Tools catalog, scroll down until you find Code Generator.
Drag and drop the function on the part you want to configure.
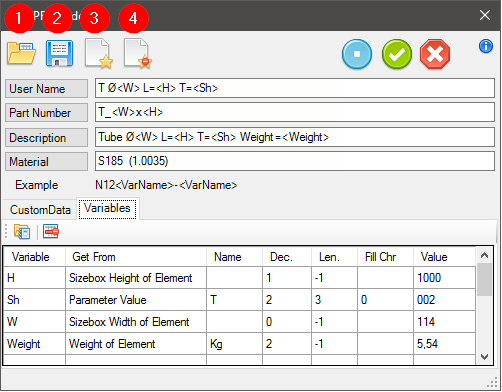
In the upper left corner, there are four icons for loading and saving a configuration (1), saving set rules (2), setting current rules as default (3), and clearing any predefined settings (4).
Place the cursor in the field (User Name, Part Number, Description, or Material) where you want to display a new variable. The variable must be placed within "greater than" and "less than" signs, like this:
On the lower half of the tool window, there are two tabs:
CustomData is usedto create and manage values under the part CustomData (own unique part properties).
Variables defines the variables to be used for a CustomData, User Name, Part Number, Description, or Material.
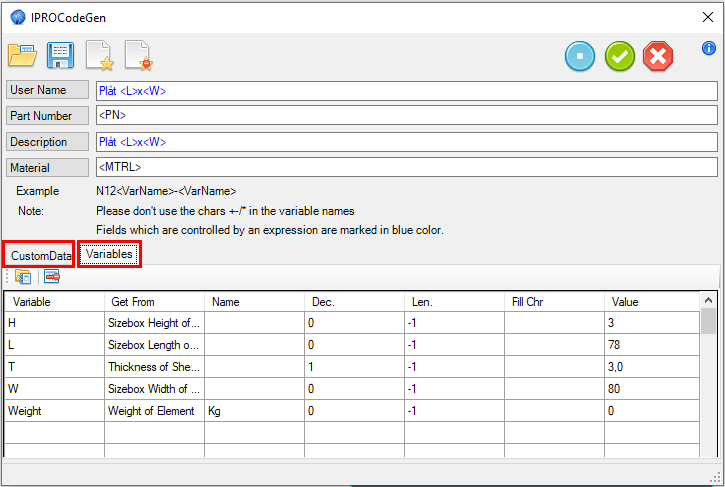
Defines the values handled as CustomData for the part and how to generate them.
Name - Name to be assigned to CustomData.
Expression - Rule for defining the value to be assigned to CustomData.
Value - Value generated by the rule and placed in CustomData.

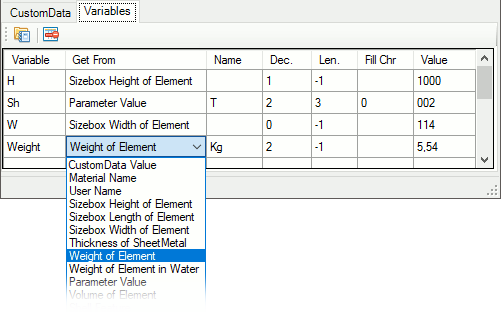
Variable - The unique name to be assigned to the variable. It is recommended to use an abbreviation, e.g., WKG for reading weight in kilograms (Weight KiloGram).
Get from - A long list of options for where to retrieve the value from.
Name - The name/unit designation of the data to be read.
Dec - The number of decimals.
Len. - Field length (-1 undefined). 3 yields three digits, even if the value has more digits.
Fill Chr - "Padding character" if Len. > 1 and a value is missing. "0" as padding yields "002" for the value "02".
Value - Result of the function. Always displayed in the rightmost column.
Below is an example of how we can display sheet metal dimensions in the history tree and under the part properties of the sheet metal, allowing us to have it displayed in the BOM. If the size of the sheet metal changes, the corresponding values in the properties are updated immediately.
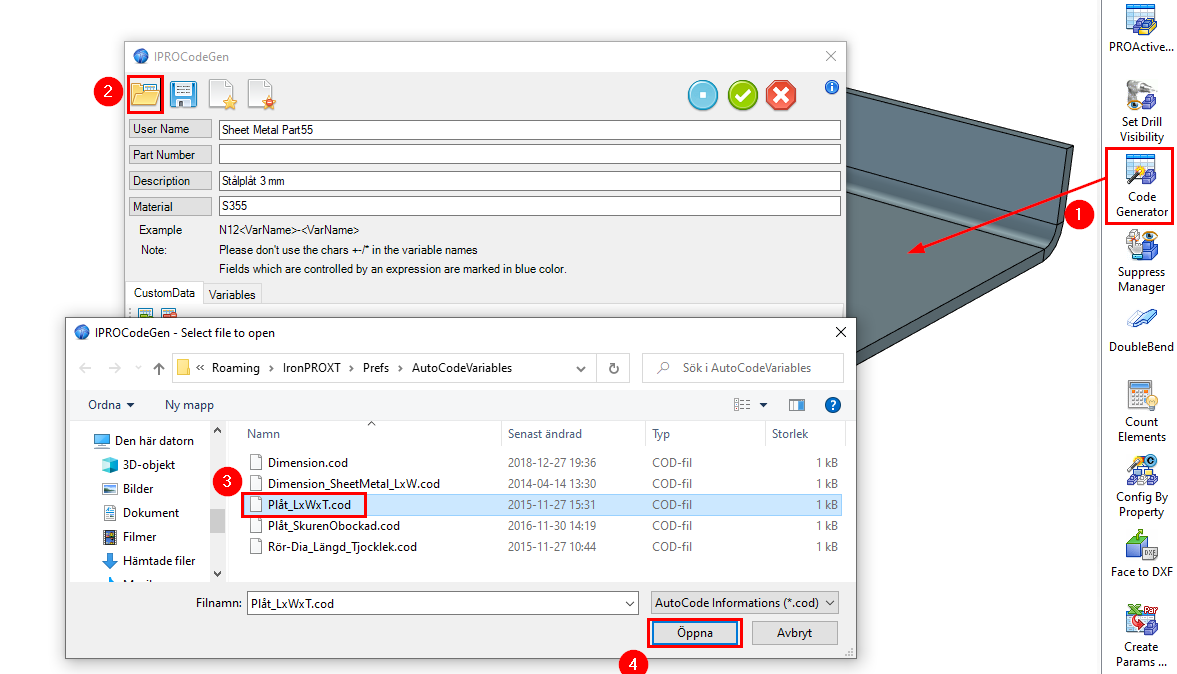
1) Drag and drop Code Generator onto a sheet metal part.
2) Choose to open an existing configuration file (*.cod).
3) Select the file SheetMetal_LxWxT.cod
4) Click on Open.
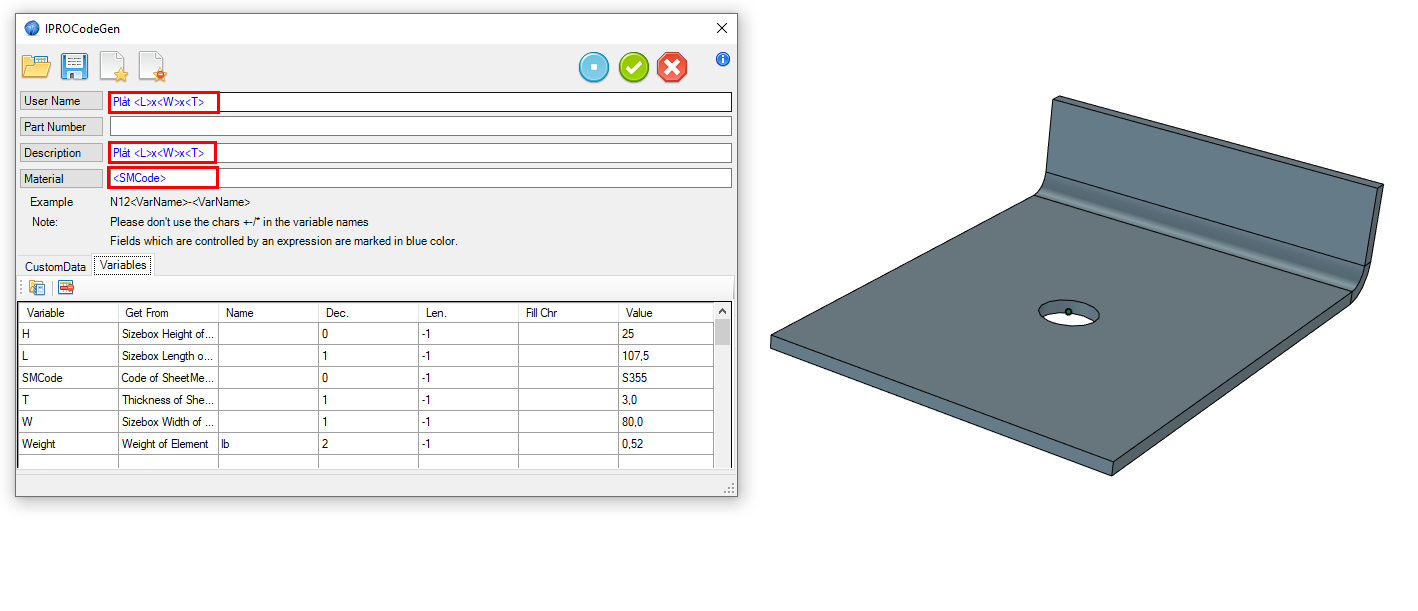
The sheet metal dimensions and material code are now fetched automatically and can be displayed anywhere, such as the name in the tree structure or the 2D drawing BOM, etc.
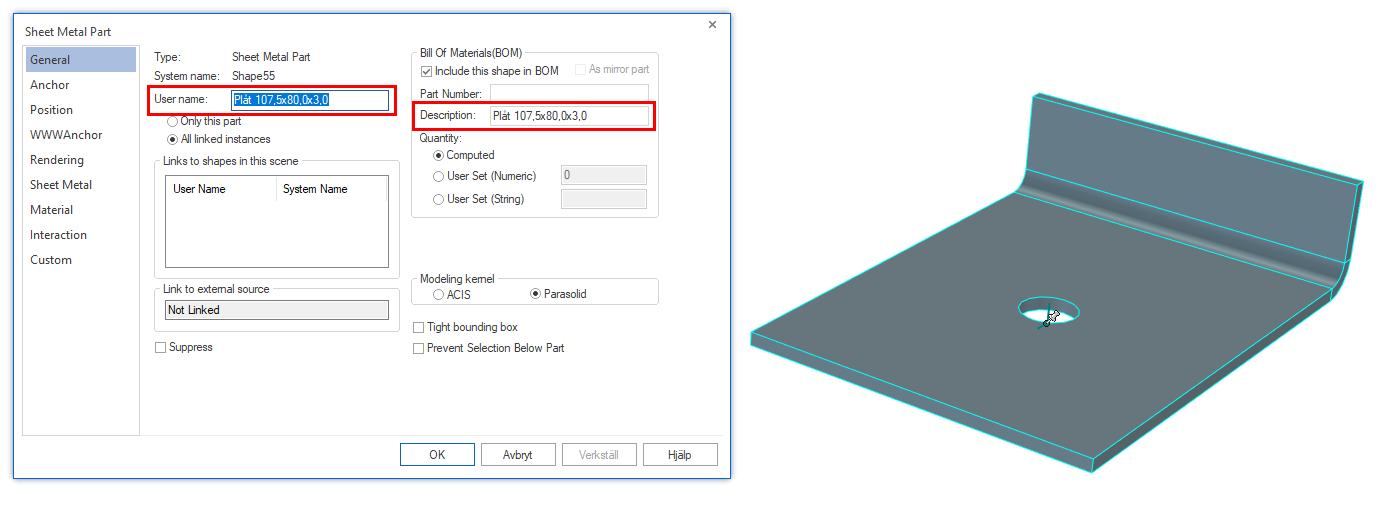
A look under Part Properties shows that the current values have been loaded.
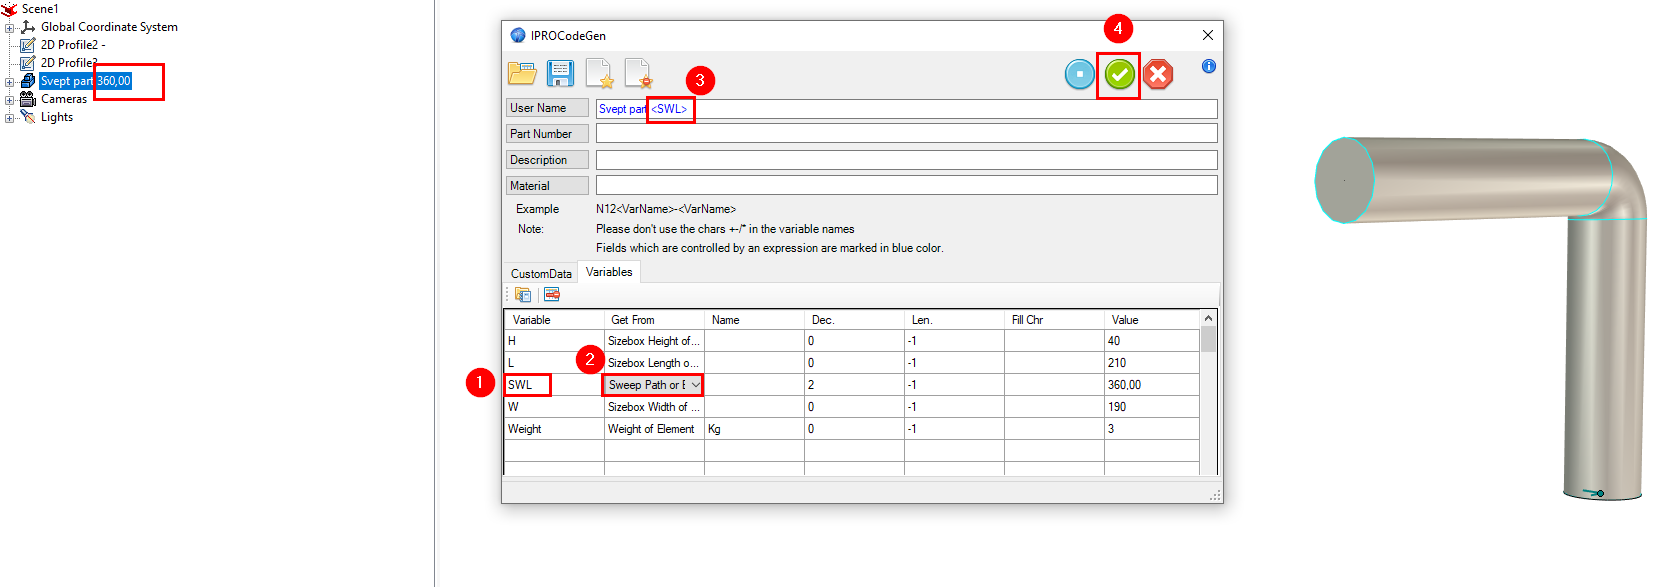
Here is a simple example of the total length of a guide curve from a Sweep Shape.
First, we drag and drop Code Generator from the ICM Tools catalog onto our part.
1) Variable - As the variable, we write SWL; keep it short and simple. SWL is short for Sweep Length.
2) Get From - Select where the value should be read from. In this case, Sweep Path or Extrusion Section Length
3) Specifies where the SWL variable should be displayed. Do not forget "greater than" and "less than". For simplicity, it is placed here at User Name.
4) Apply.
Nu ser vi att längden från partens Sweep Shape visas som en del av partens namn i historieträdet. Hade vi valt att lägga <SWL> även under Part Number och/eller Description så hade detta värde även visats i en BOM.
Code Generator is available in the IronCAD mechanical add-on, which is included when you have an active support contract.
Do you not have an active support contract? Please contact us at solidmakarna or 08-556 - 185 40 and we will solve it!