Looks like you don't have ESC button on your device
Download IronCAD DCS
Choose one of the following options
trial versionHas a license
Looks like you don't have ESC button on your device
Choose one of the following options
trial versionHas a license

Emil Rindell

Jonas Bryntesson

Henrik Andersson
2023-06-01
Emil Rindell
Jonas Bryntesson
Henrik Andersson
2023-06-01
It is common that you want to add some text to your part in IRONCAD. This is often quite simple and self-explanatory, but some steps require a little extra knowledge and shortcuts. We will go through how to create both negatively extruded (cutting), positively extruded (standing out), 2D profile, curved text via Wrap Curve and Split Face and arched text via CAXA.
In IRONCAD we can create 3D text in a few different ways. The oldest way is to use the 3D Text tool found under the Annotation tab:
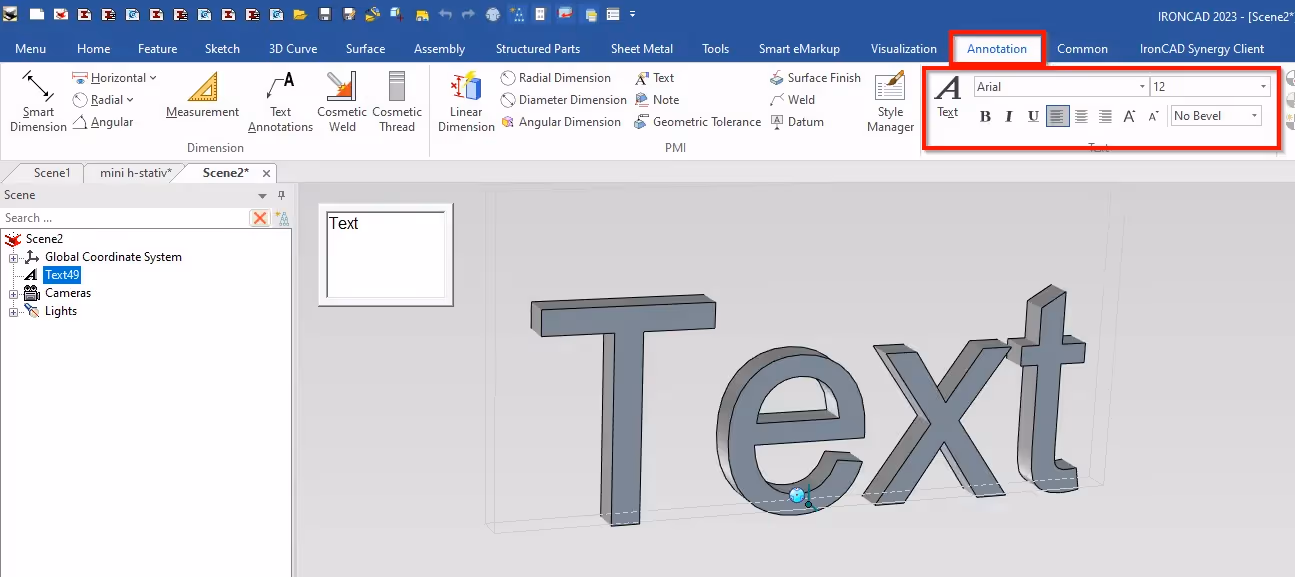
We recommend NOT to use this tool as it is relatively outdated and better tools are available. Moreover, the finished text will be a type of "triangulated surfaces" defining a 3D body, but lacking information on volume (and therefore weight) and lacking "roundness", therefore it is not possible to measure radii/diameter. Therefore Text3D from the add-on program IC Mechanical is better to use in this case. Text3D works in a different way and where you as a user can choose how you want the font to be built up either as negatively extruded (cutting), positively extruded (outwardly standing), 2D profile. In this post, we will mainly focus on the latter but also mix in some other functions and features.
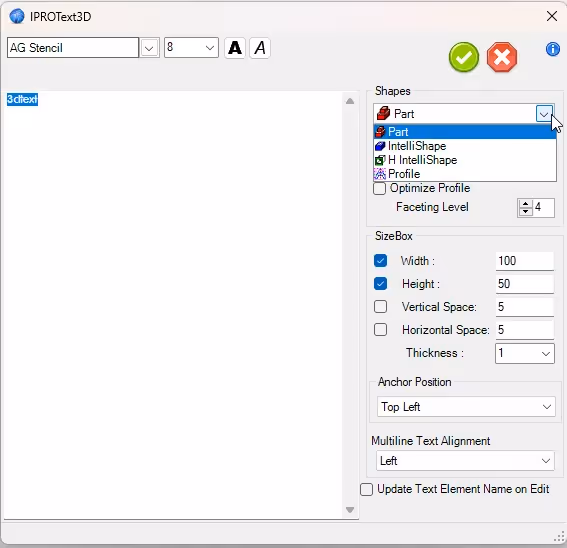
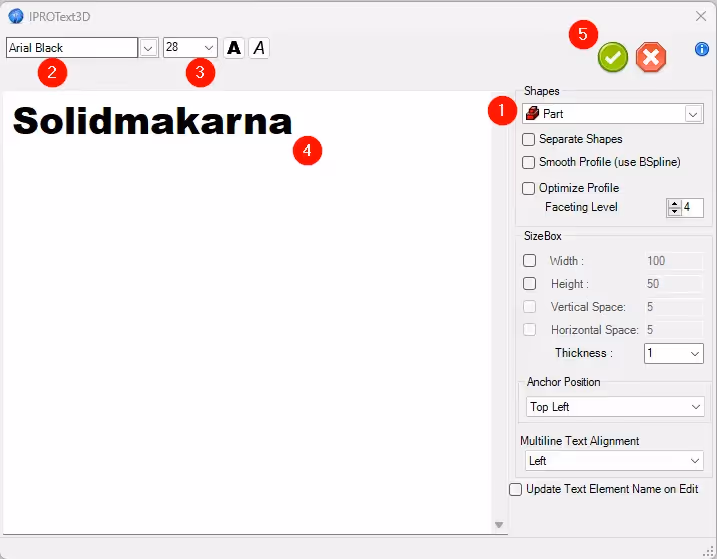
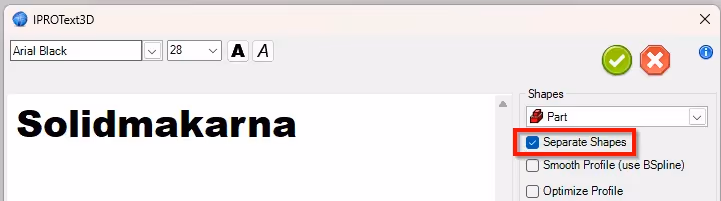
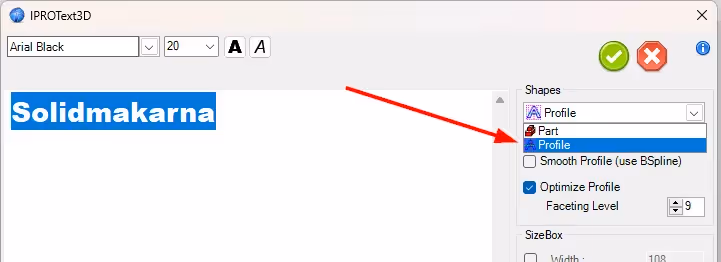
Start by pulling out the Text3D function in the scene from the ICM Tools directory. Under the drop-down menu (1) Shapes, select Part, (2) then change to the font you want to use, (3) set the size, (4) type your text and (5) then execute the command:
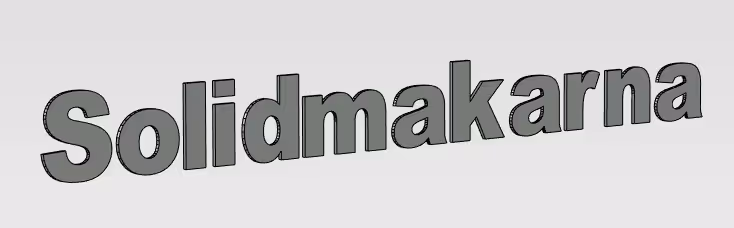
Results:
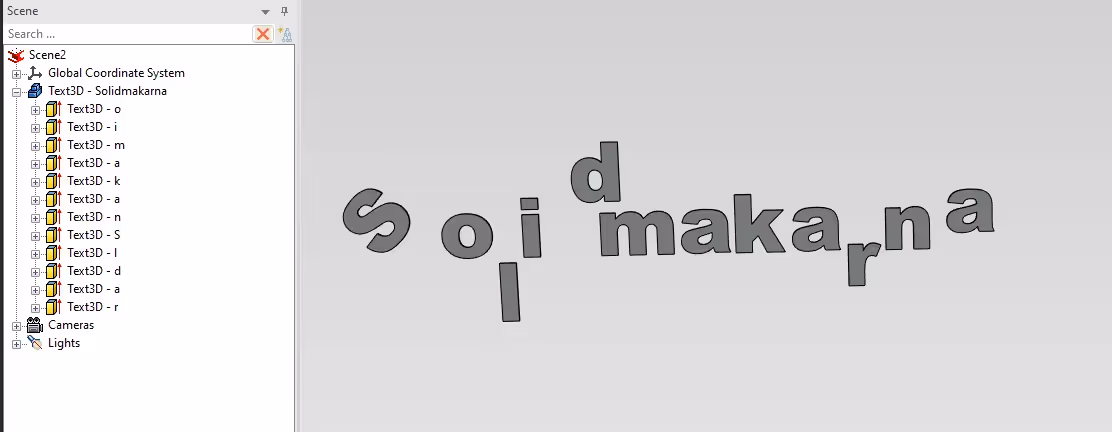
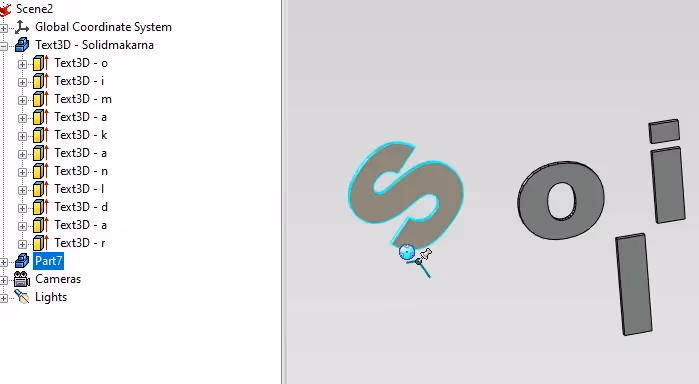
In the first stage, you also have some options to control the text more the way you want it. A popular feature is Separate Shapes where you separate each letter into its own features:
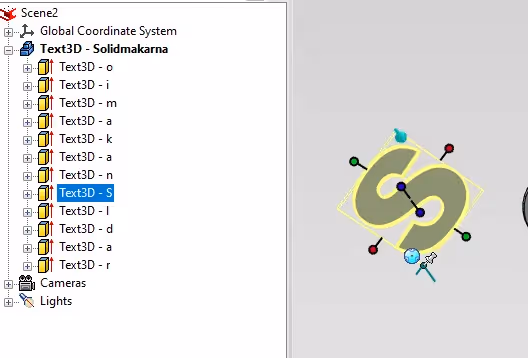
Then you have the possibility to move, rotate and change the letters individually:
A little side note but if you want to separate a letter into its own part you can do this by selecting the letter at the feature level....
...then go to the ICM Utils directory and pull out the Split Intellishape tool in the scene...

...and suddenly you have your own part of the letter:
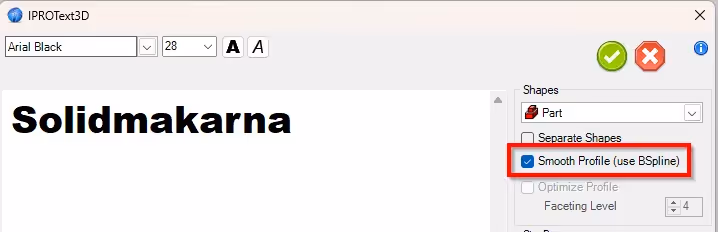
Back to Text3D and the Smooth Profile (use BSpline) function that smooths and rebuilds the cross section to BSplines:
Without BSplines:

With BSplines:

Via Optimize Profile you can get a "higher resolution" of the text, i.e. more dots:
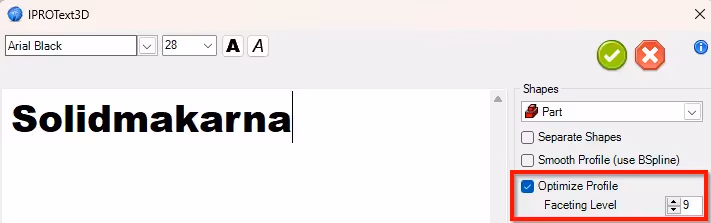
Results in the cross section:

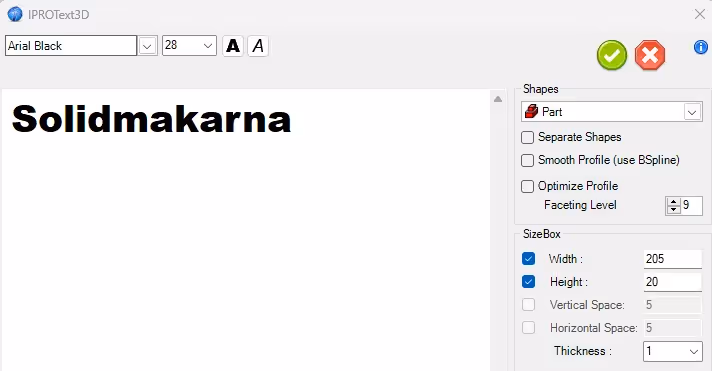
The Sizebox options are for setting a size of the text, but it is worth knowing that the size relation of the font is not retained. Here you can also control the thickness, etc. We will not go through those functions in this post, but here you can explore a little yourself :-).
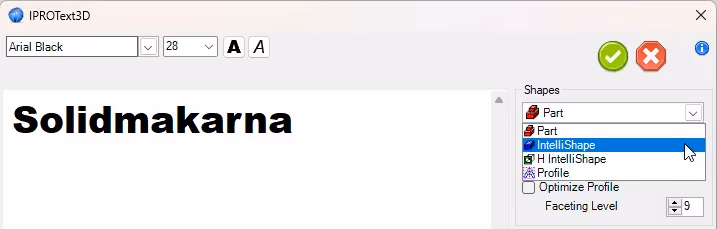
Drag the Text3D tool onto a surface where you want an outward facing text like a feature, enter the font, size and other settings and under Shapes switch to IntelliShape:
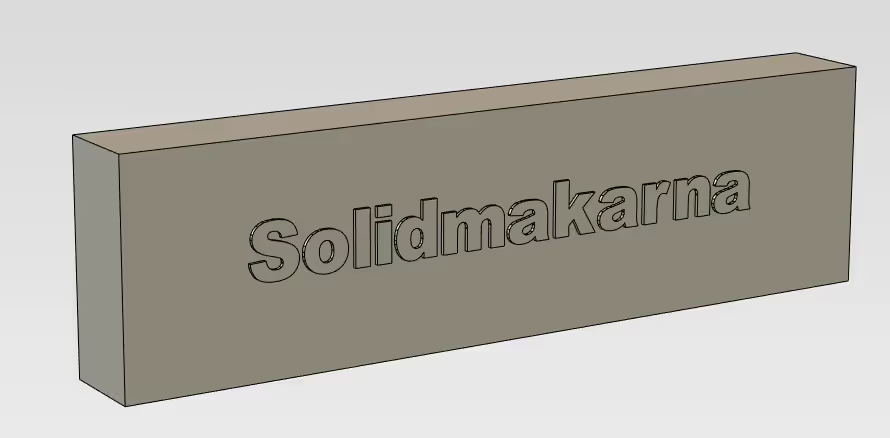
Results:
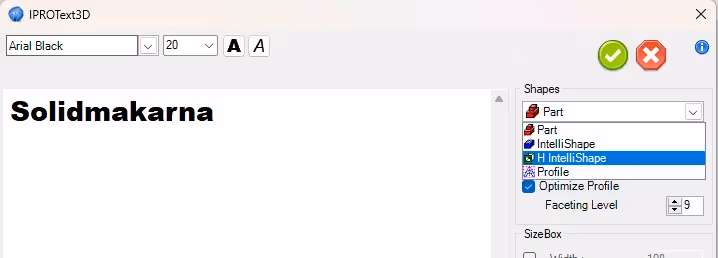
Drag out the Text3D tool on a surface where you want a cutting text as a feature, enter the font, size and other settings and change under Shapes to H IntelliShape:
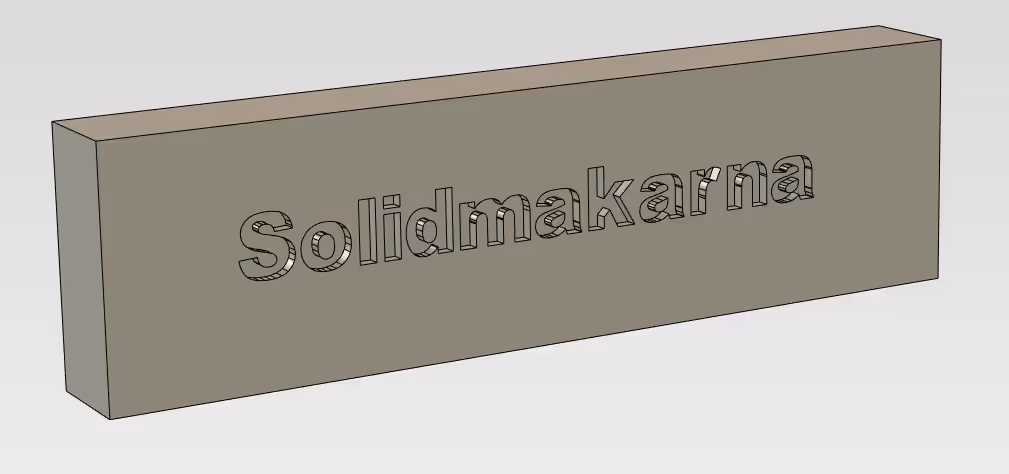
Results:
On a side note, if you want to create 3D text in a plate, it's important that each character is "open", meaning that, for example, the "triangle" in an A doesn't "fall out". Then you can first read this post 20 Free fonts for laser cutting
Then, using the above instructions, you can create a plate with text that is suitable for laser cutting, like this:
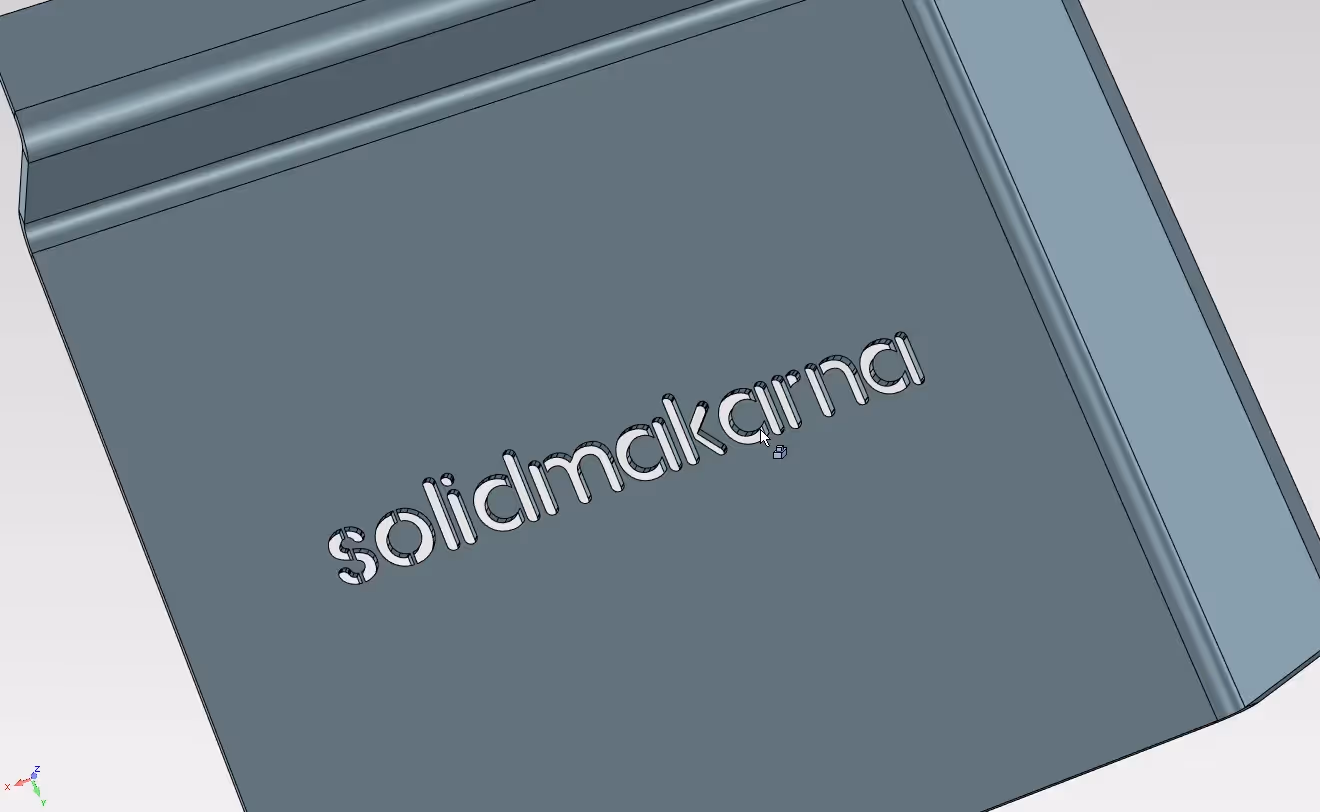
Drag the Text3D tool in the scene or on a surface. Enter the font, size and other settings and switch under Shapes to Profile:
Results:

First create your text using the Text3D tool above and select Profile as an option. Then watch this movie where we use the Wrap Curve command to project the text onto the surface:
Once this step is done, we now want to cut the surface with our text. We use the Split Faces function, see this movie:
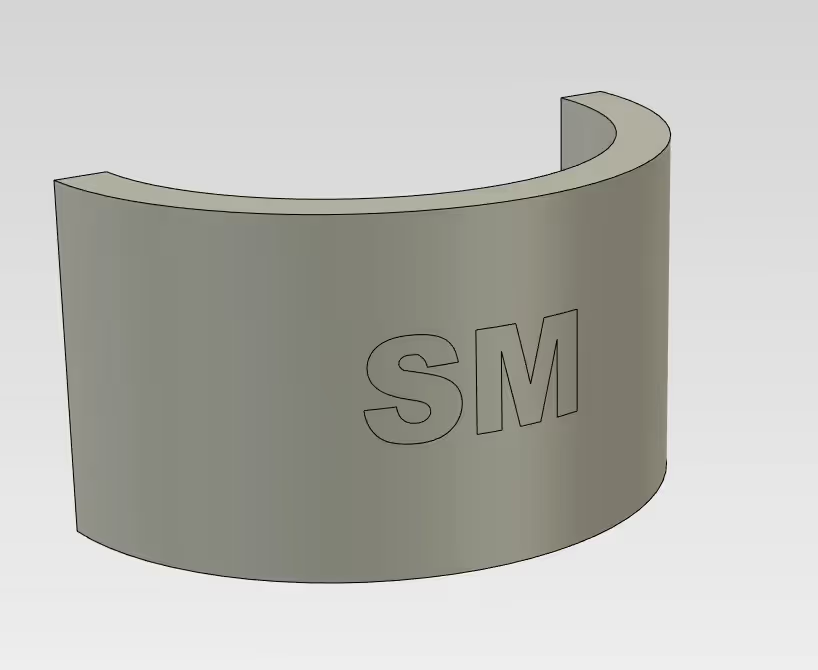
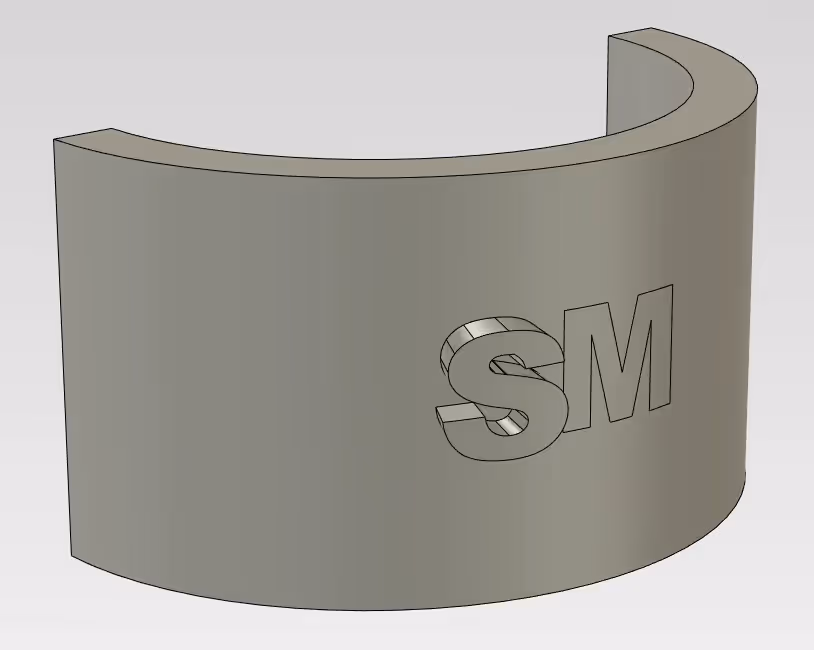
When this step is complete, you should have a model that looks something like this:
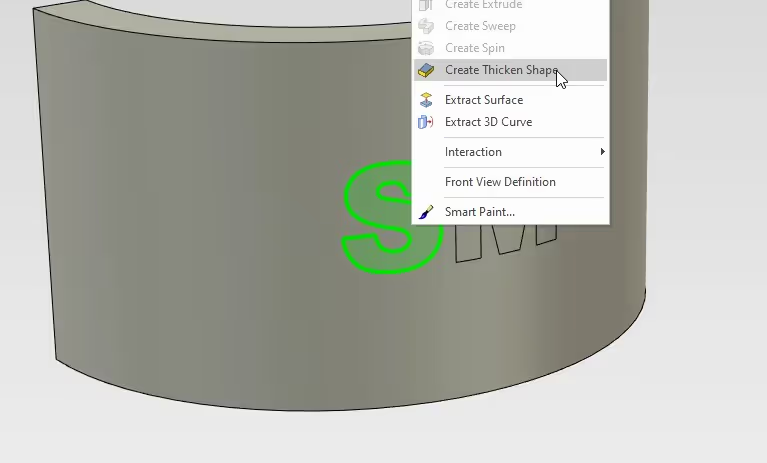
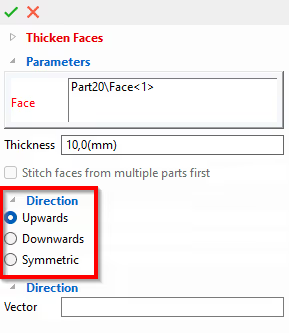
Now to create outward facing text, we go down to surface level on one of the letters, right click and then select Create Thicken Shape...
...now set the thickness under Thickness followed by the direction of the surface which in this case is Upwards...

the result is this...
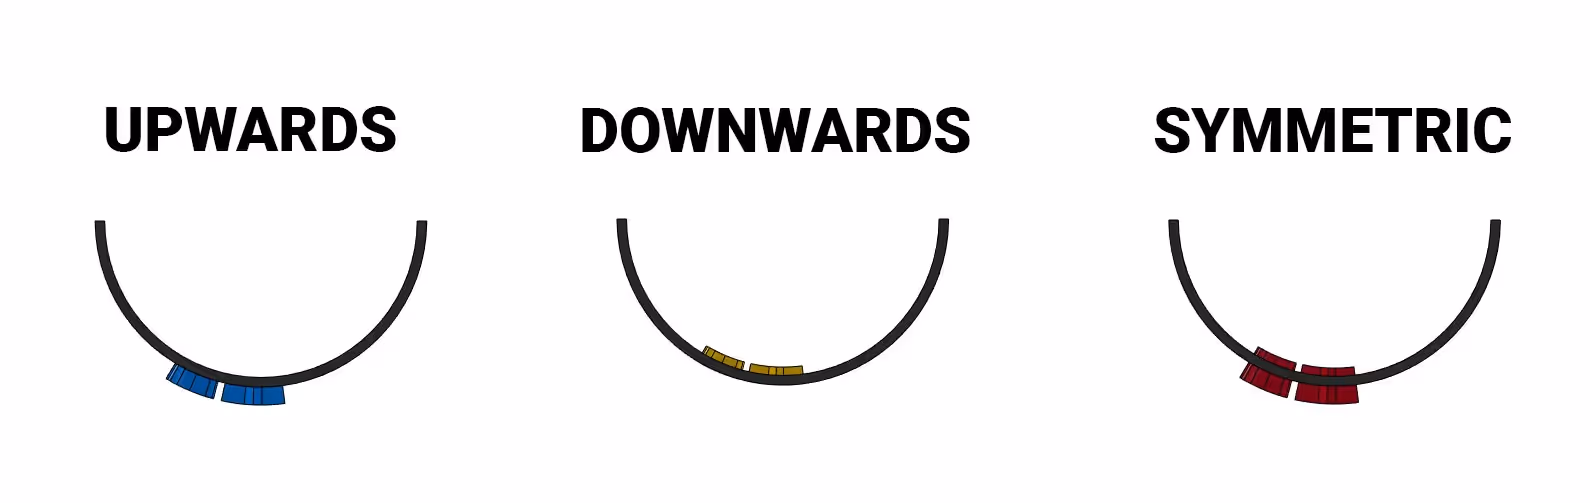
...by changing the direction we want to create the surface i.e. Upwards, Downward or Symmetrical...
we influence how the text will change on the surface.
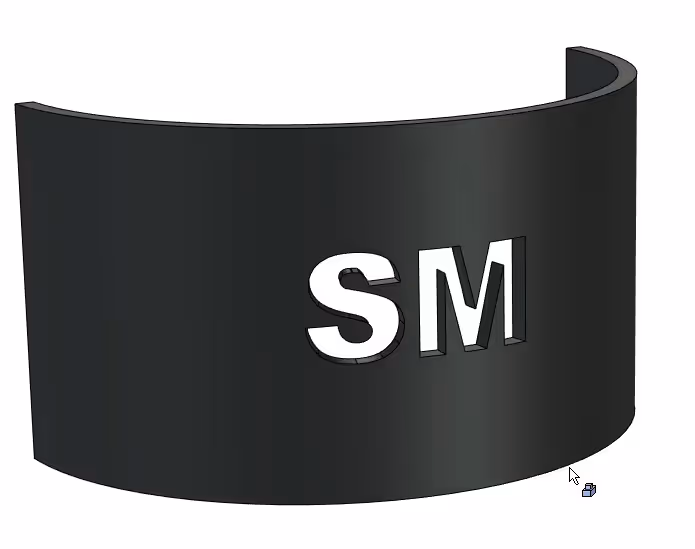
Then we combine this with a Boolean operation:
Then we can get our text the way we want it:
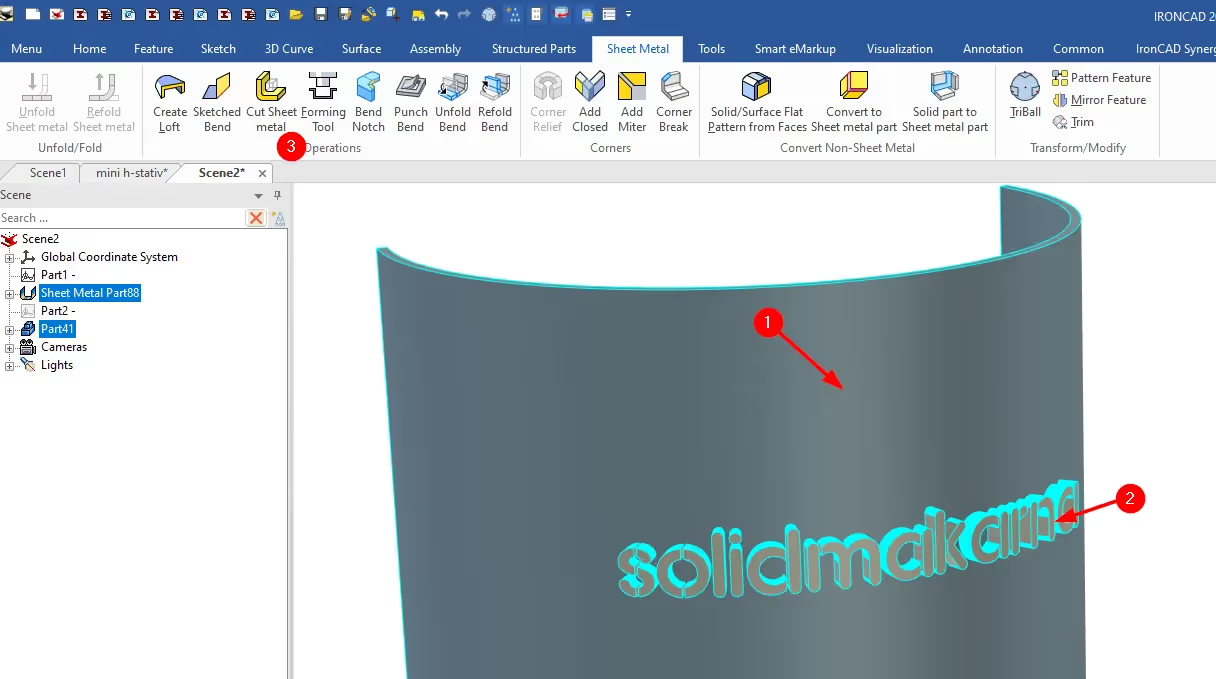
We can do almost the same way in a sheet metal, first make sure you have a text created with laser cutting customization (see the Negatively Extruded (cutting) part feature on existing part higher up in the post). There you use Symmetrical under Create Thicken Shape then use a Boolean>Union to merge the letters into a part. Followed by Cut Sheet Metal . You use Cut Sheet Metal (under the Sheet Metal tab), hold down the SHIFT key first highlight the sheet metal then the part and then press Cut Sheet Metal:
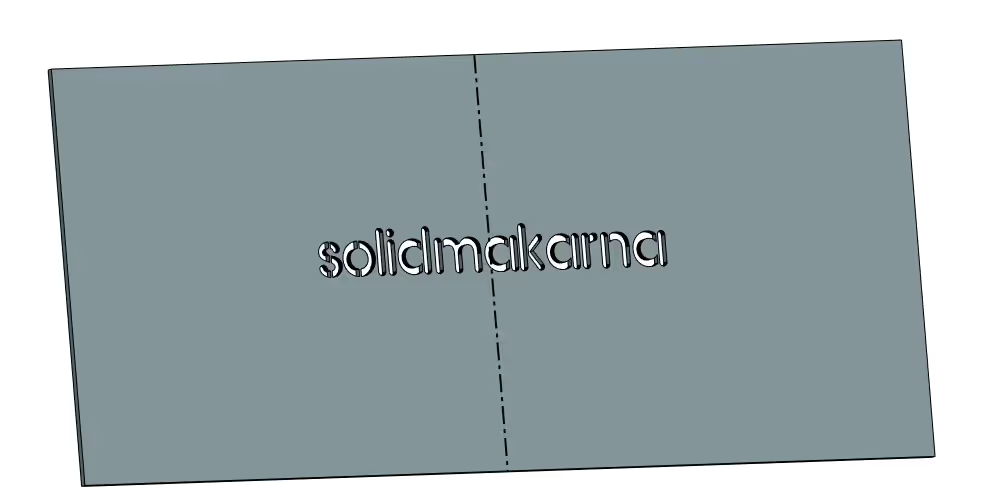
Then delete or remove the part containing the text and you will get this result...
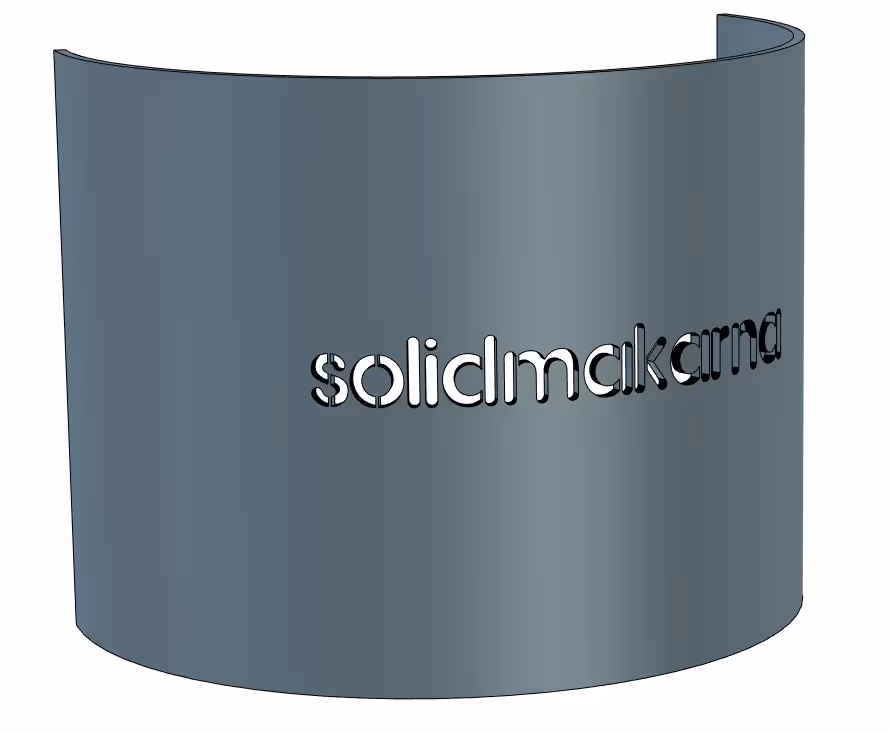
...and on distribution:
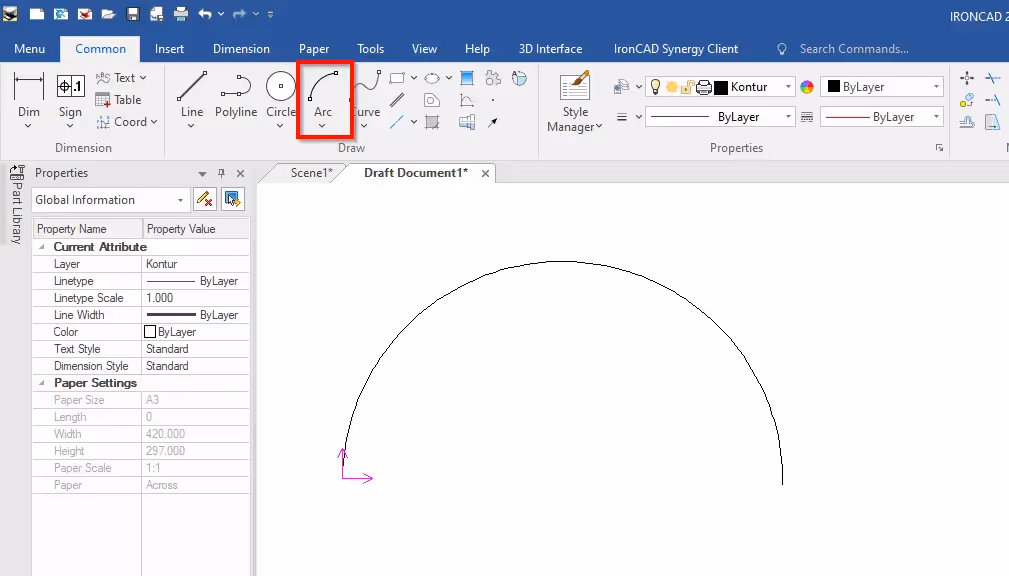
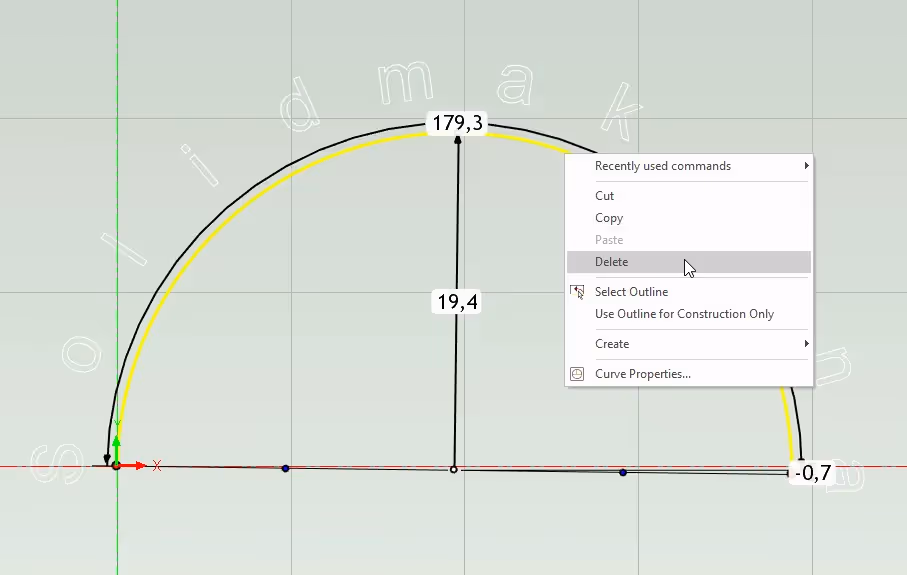
The only way to create an arc-shaped text in IRONCAD is via CAXA Draft, where you then export the font and import it into a sketch (2D-Profile). Start by creating a new drawing in CAXA Draft, for example via File>New CAXA. Draft

Then draw an arc using the Arc command.
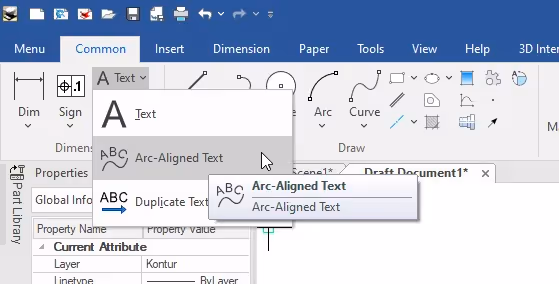
Then go to the Common tab followed by Text>Arc-Aligned Text
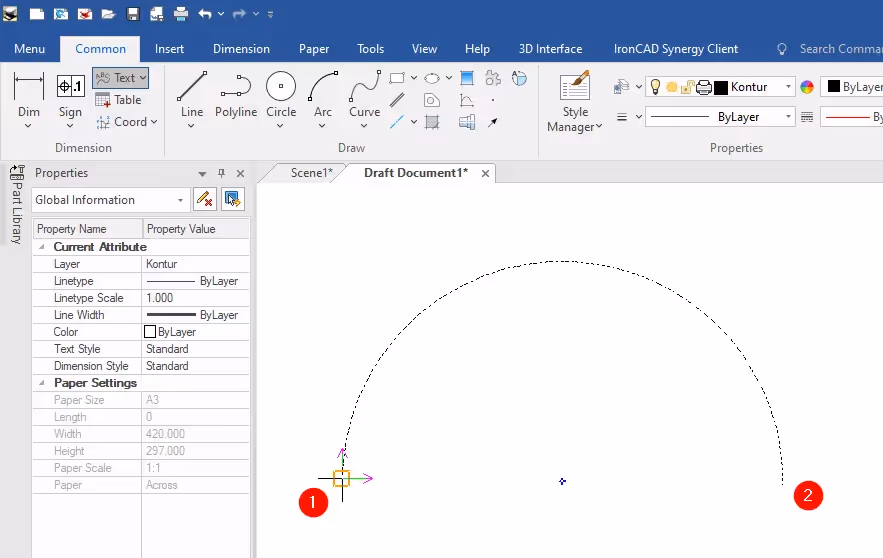
Then press the arc you just created, here you then get to choose the direction of the text, in this case we press the arrow going upwards

Then select (1) the start point and then (2) the end point.
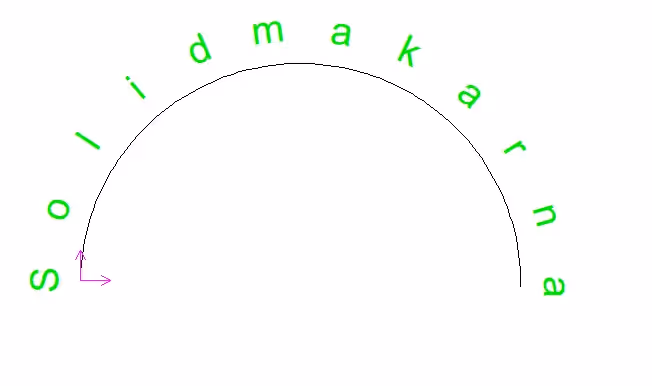
Here you write your text and make the settings you need such as Offset which is the distance from the arc. Here you can experiment a little yourself, we run the default settings followed by Ok...

...the result is as follows:
Make a box mark over the entire text, then type Explode on the keyboard, followed by Enter...

Then save the file. Now go to the 3D scene, then go into the Sketch tab and press 2D Shape (you may need to press a point in the scene just to place the sketch)...

...followed by right-clicking on the cross-section and selecting Import...

Now locate the file you have created, select the file and then press open, then press OK on the box that appears with layers, then you should have the text for the cross section...
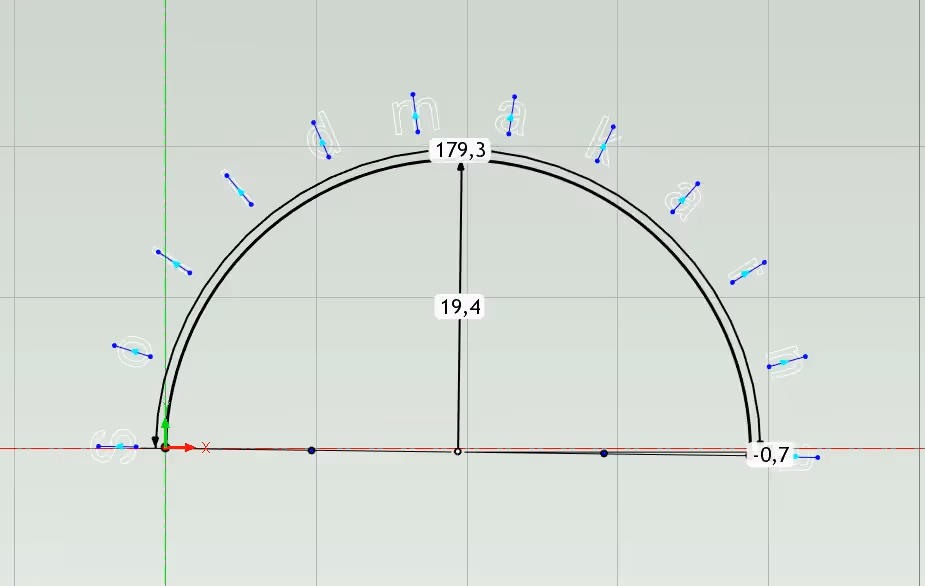
Then select the arc, followed by right-click and Delete...
Now execute the command by pressing Finish...

Now select the profile and right click on it and select Create>Extrude....
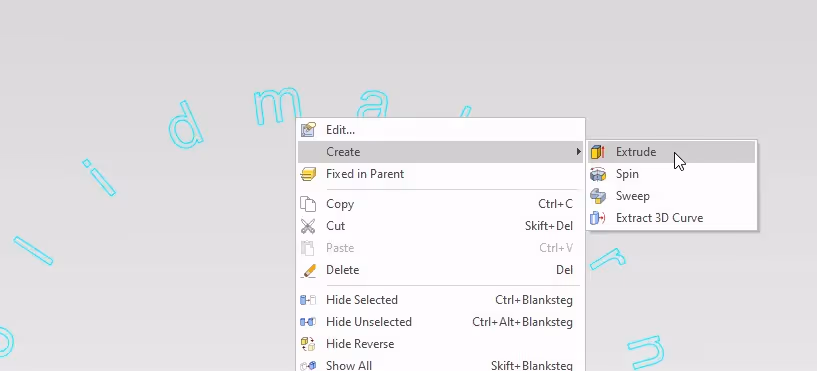
Here you now have the possibility to control how you want the text to be extruded, as your own part, as a feature, add or remove material etc. In this demo we only change the distance to 5 mm (i.e. the thickness) followed by Ok...

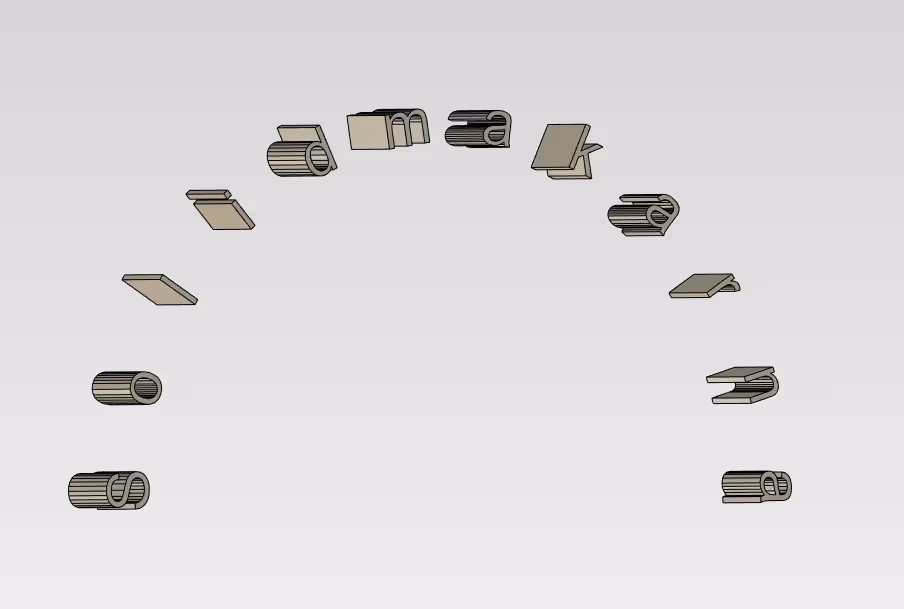
results:
I hope you enjoyed this post, which was quite long! Please let us know if you have any questions or if you miss anything in the post.
Answer: Here we publish tips, guides, news and solutions for those who work with IRONCAD and Design Data Manager (DDM). The blog covers everything from basic functions to advanced workflows, helping you to optimize your design work. You'll find examples of smart shortcuts, practical instructions, solutions to common problems, and best practices for product design, mechanical design, and product data management.
Answer: Our guides and tips are designed for both beginners and experienced CAD users. They are aimed at designers, engineers and project managers who want to work more efficiently with IRONCAD and DDM, improve the design process, reduce mistakes and save time in product development.
Answer: We regularly publish new articles when the software is updated, when new features are introduced, or when our users ask for solutions to specific problems. The blog is therefore a reliable source for keeping up to date and getting tips that make everyday CAD work easier.
Answer: Many of our instructions and tips work in multiple versions, but we clearly indicate if an article applies to a specific version. We strive to make the content useful for older versions as well, and also provide recommendations on how to adapt workflows to the version you are using.
Answer: Absolutely! If you can't find the solution in the blog, you can contact our technical support via solidmakarna.support. Our experts will help you with everything from installation and configuration to advanced features in IRONCAD and DDM, so you can solve problems quickly and efficiently.
Answer: Yes! We appreciate suggestions from our users. If you have questions, tips or want us to address a specific issue in IRONCAD or DDM , please contact us via our contact form and we will prioritize relevant topics in future posts.
Answer: The blog contains, among other things:
Practical step-by-step guides to help you use IRONCAD and DDM more effectively.
Productivity and workflow tips for faster design and construction.
Solutions to common problems encountered by users in CAD programs.
Updates and news on new features, versions and improvements.
Best practices for data management and project organization in DDM.
Answer: All tips and guides are directly applicable in daily work. For example, you can use shortcuts and smart features in IRONCAD to speed up modeling, structure files better in Design Data Manager, or follow our step-by-step solutions for specific problems that often come up in design projects.
Answer: We strive to ensure that all guides and tips are relevant to the latest versions of IRONCAD and DDM. We also clearly mark when a post applies to an older version, so you always know if the instruction is directly applicable to your system.
Answer: Yes! Many of our users share the articles with colleagues and use them as internal training materials. The blog is a great complement to formal training and helps teams learn features faster, avoid mistakes, and standardize workflows in IRONCAD and DDM.