Looks like you don't have ESC button on your device
Download IronCAD DCS
Choose one of the following options
trial versionHas a license
Looks like you don't have ESC button on your device
Choose one of the following options
trial versionHas a licenseScroll down to start reading the guide
Double-click the installation file to begin the installation.
If you have not yet downloaded the IronCAD 2026 installation file, you can find it in our download center.

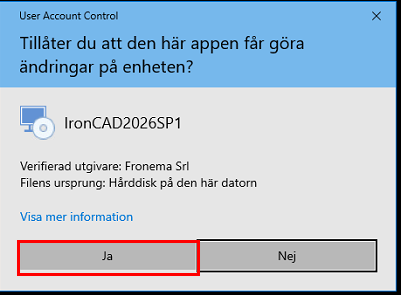
Click Yes if/when this message appears.
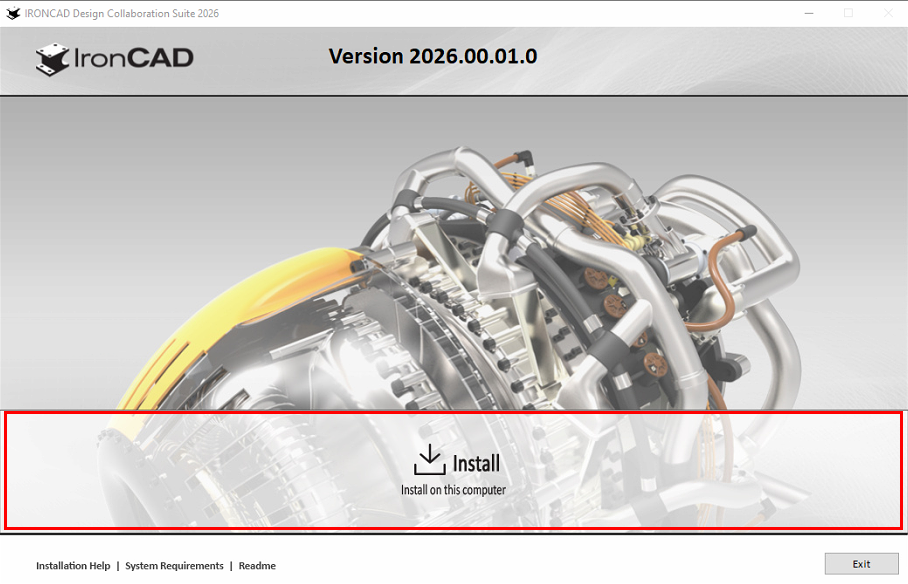
Now choose to start the installation by clicking Install.
If you get an error message after the installation process is complete, it may be because you have a space in your Windows username. Try unpacking the installation file manually by following the steps below. We have written how to do this in both Windows 11 and Windows 10.
This is for Windows 11
If the path to the folder that handles "My Documents" and "Downloaded Files" etc. contains a space in your username (\Firstname_space_Password\) you need to manually unpack the installation file, otherwise an error message will appear during installation. To unzip, you can for example use WinRAR/WinZIP or preferably the easy to use and compact 7-zip: https://www.7-zip.org/
Then you can right-click on the file you downloaded and choose Show more options

Then select 7-zip followed by Unzip to "IronCAD_DCS2023SP1_SWE\

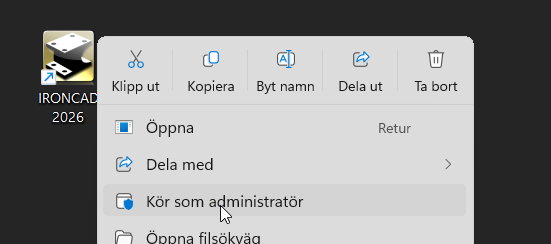
Then run the installation file itself in the new folder by right-clicking on the *.exe file and selecting Run as administrator:

This applies to Windows 10
If the path to the folder that handles "My Documents" and "Retrieved Files" etc. contains a space in your username (\Firstname_Space_Password\) you need to manually unzip the installation file, otherwise an error message will appear during installation. To unzip, you can use WinRAR/WinZIP or the easy to use and compact 7-zip: https://www.7-zip.org/
Then you can right-click on the file you downloaded and choose to unzip it into a new folder which will be created automatically.

Then run the installation file itself in the new folder by right-clicking on the *.exe file and selecting Run as administrator:

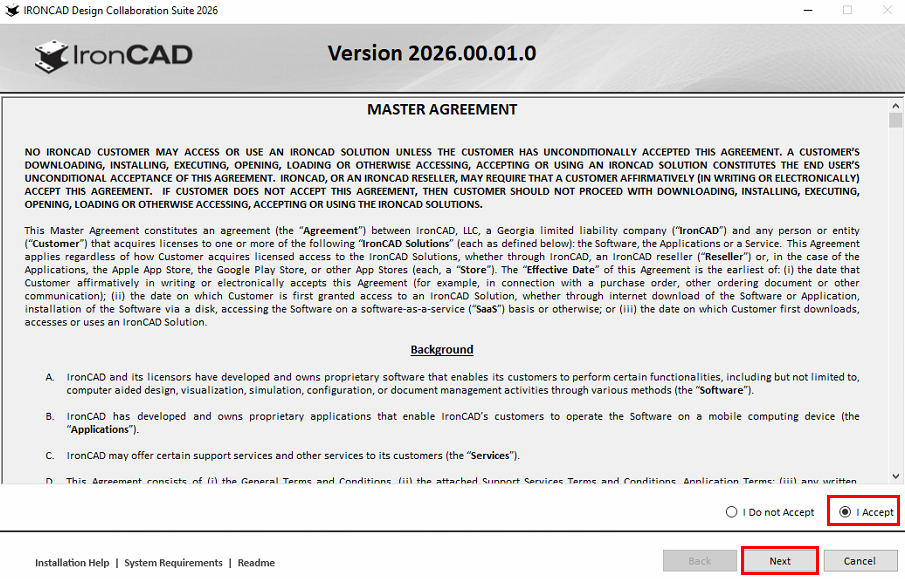
Select to accept the license agreement by checking the I Accept option, then click Next.
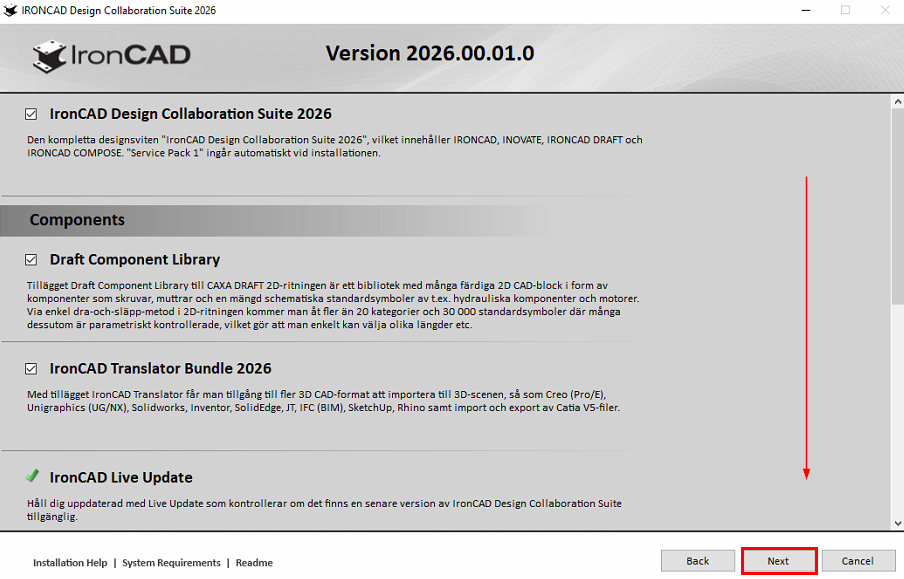
Here you can select which add-ons to install with IronCAD 2026.
Scroll down the list to see all add-ons. Remove an add-on if you wish by unchecking the box to the left of the add-on.
NOTE! We recommend that you include all add-ons in a standard installation.
Then click Next.
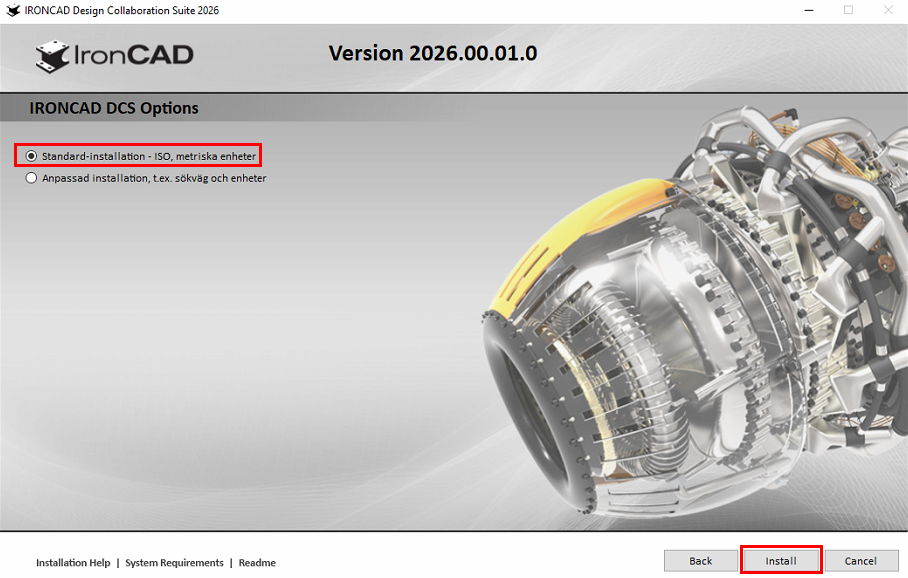
A) Select "Standard installation, ISO, metric units" to run a standard installation.
You can also select "Custom installation..."which allows you to change the installation path (see next step -> 5B).
Click Install to start the installation without customizing it.
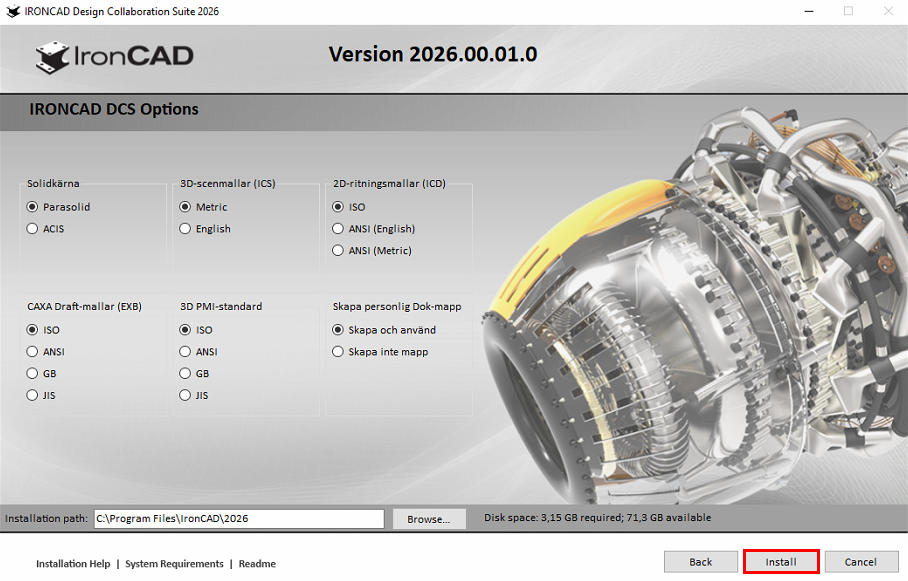
When selecting "Custom installation...", you can change the installation path if desired; see the bottom of the window.
Click Install to begin the installation according to your custom settings.
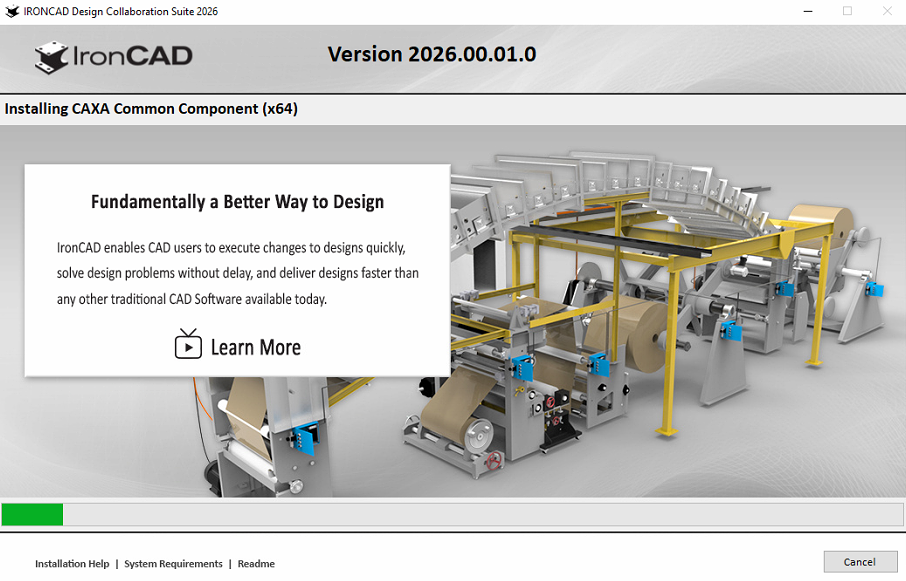
The installation of IronCAD 2026 has now begun. At this stage, you do not need to make any selections. Sit back and let the installation process run. You may even have time for a cup of coffee while you wait.
IronCAD 2026 and all selected add-ons are now installed.
Now press Finish (green button below) to complete the installation.
NOTE! Do not start IRONCAD the Finish and Launch button. First complete the installation, then start IRONCAD the instructions below.

We highly recommend that you take a look at this short film, which goes through the final part of the installation.
Are you an existing customer? If you have purchased a license, it must first be activated before you can start IRONCAD, INOVATE DRAFT.
Click here to go to our license activation guides.
Have you installed IronCAD 2026 to try the program free of charge for 30 days?
Click here to view a guide on how to do this.
Now that the program is activated, simply double-click on the yellow IRONCAD desktop icon or locate it via the Windows Start menu.
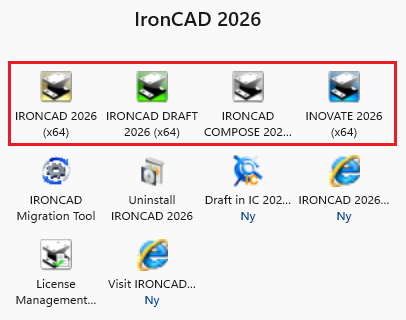
Are you looking for one of the programs INOVATE, DRAFT or COMPOSE can be found in the Windows Start menu, in the IronCAD group.
Troubleshooting problems with 2D drawings
If you experience problems opening drawing views in the 2D drawing (file format *.icd), right-click on the yellow IRONCAD desktop icon IRONCAD select "Run as administrator." Make sure you do not have IRONCAD before running as administrator.
NOTE - You only need to do this once, not every time you start up.
Let the program start as usual. Once it has started, close it again. You can then start it in the usual way by double-clicking on the yellow IRONCAD desktop icon (as a regular user).
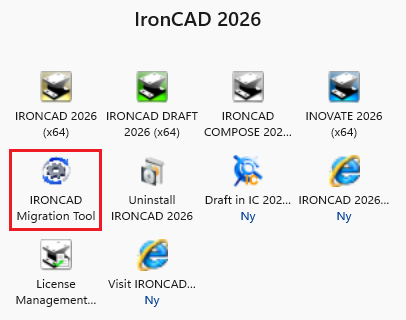
If you have previous versions of IronCAD installed on the same computer, you can migrate settings, keyboard shortcuts, etc. from a previous version.
This video explains how to do it.
The IRONCAD Tool program can be found in the Windows Start menu under the IronCAD group.